You need the Civic.ly app installed and configured on your phone. If you have not done this yet, follow Configure Your Mobile Device first.
In this step you will take a photo of something nearby and watch Civic.ly map it and describe it using AI. Then you will check the results in the web app. This is the same process you will use to build your full asset register — just with a test asset to start.
Take a Photo and Create an Asset
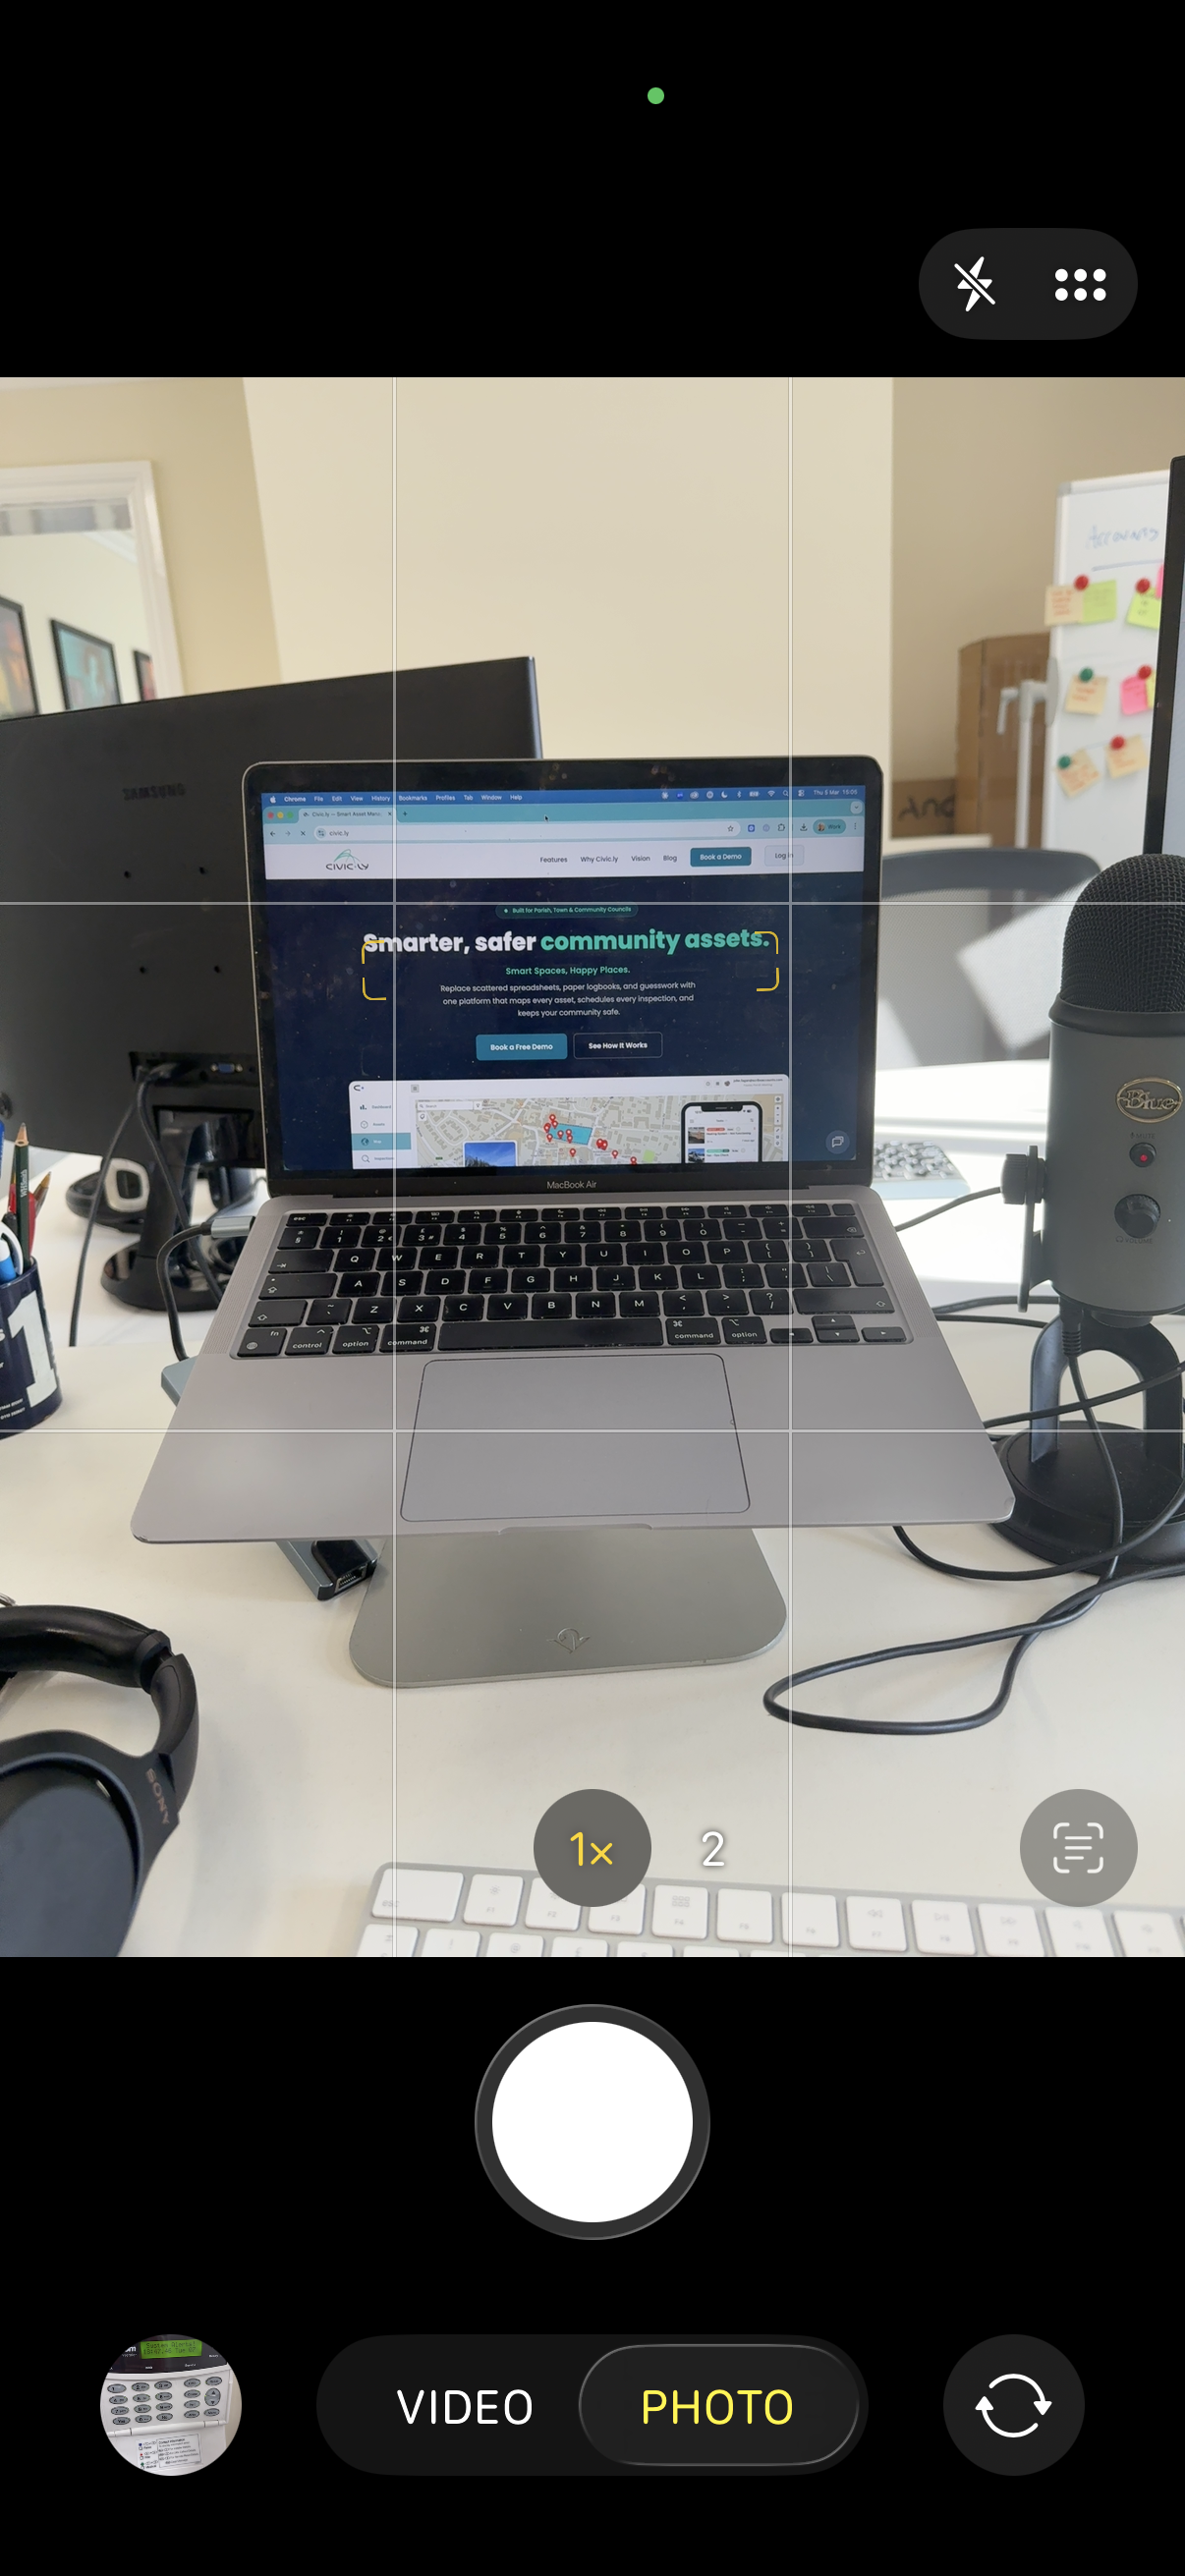
- Open your phone's camera and take a photo of something nearby — your laptop, a desk, or ideally something outdoors like a lamppost or a bin.
- Open the Civic.ly app.
- Tap the + (plus) button.
- Tap Asset.
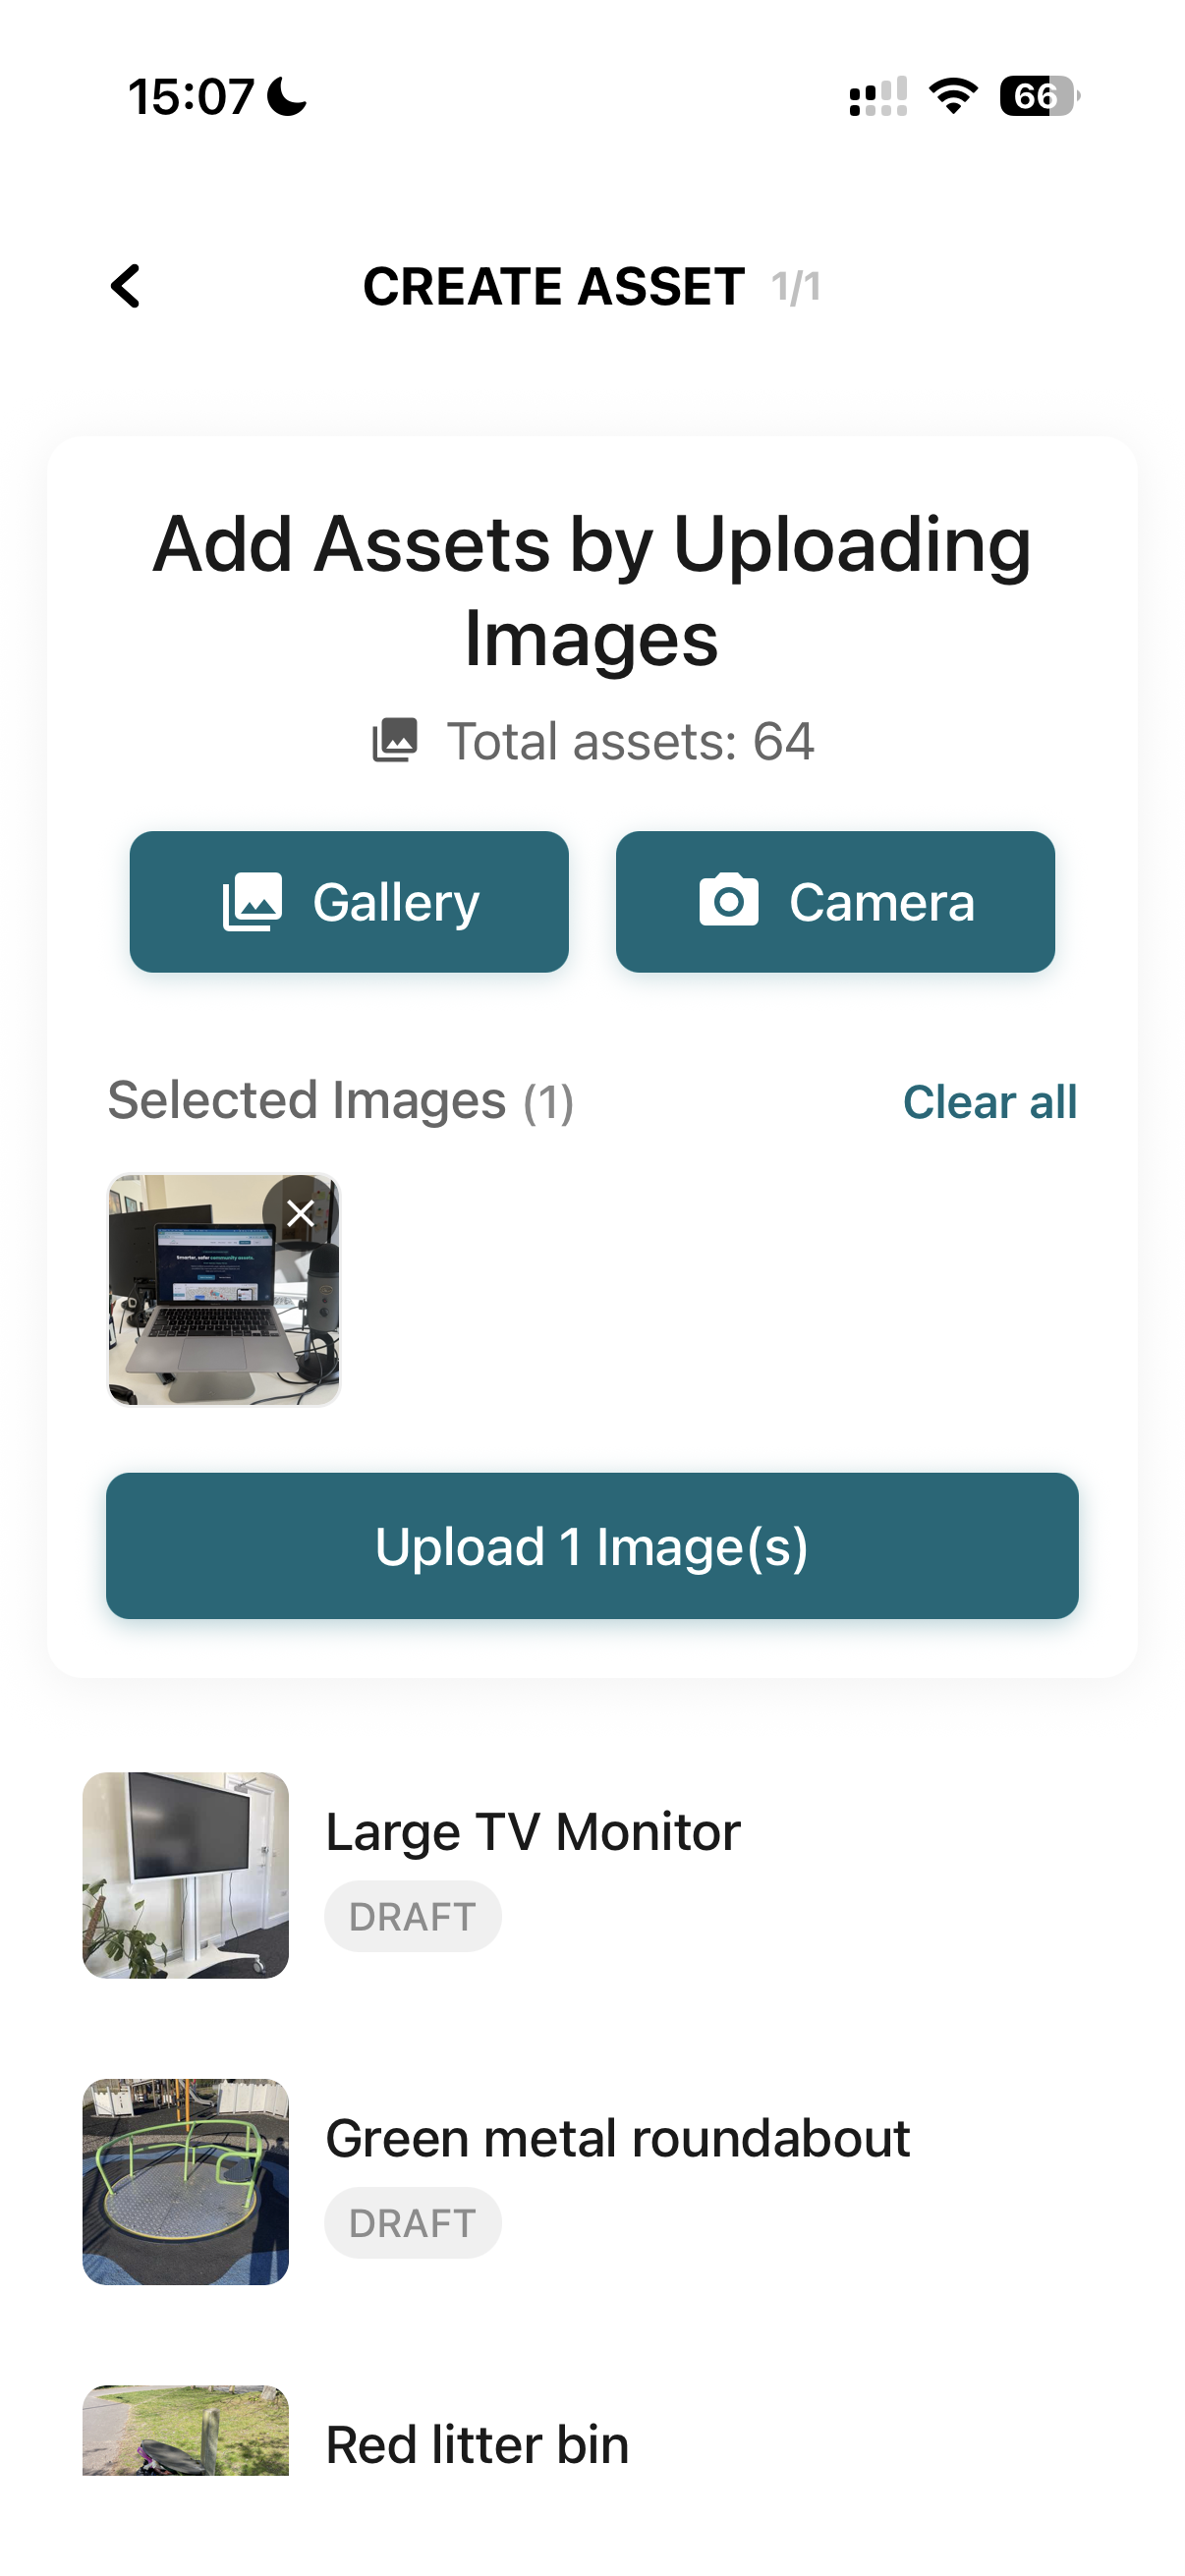
- Tap Gallery to find the photo you just took.
- Select the photo and tap to upload it.
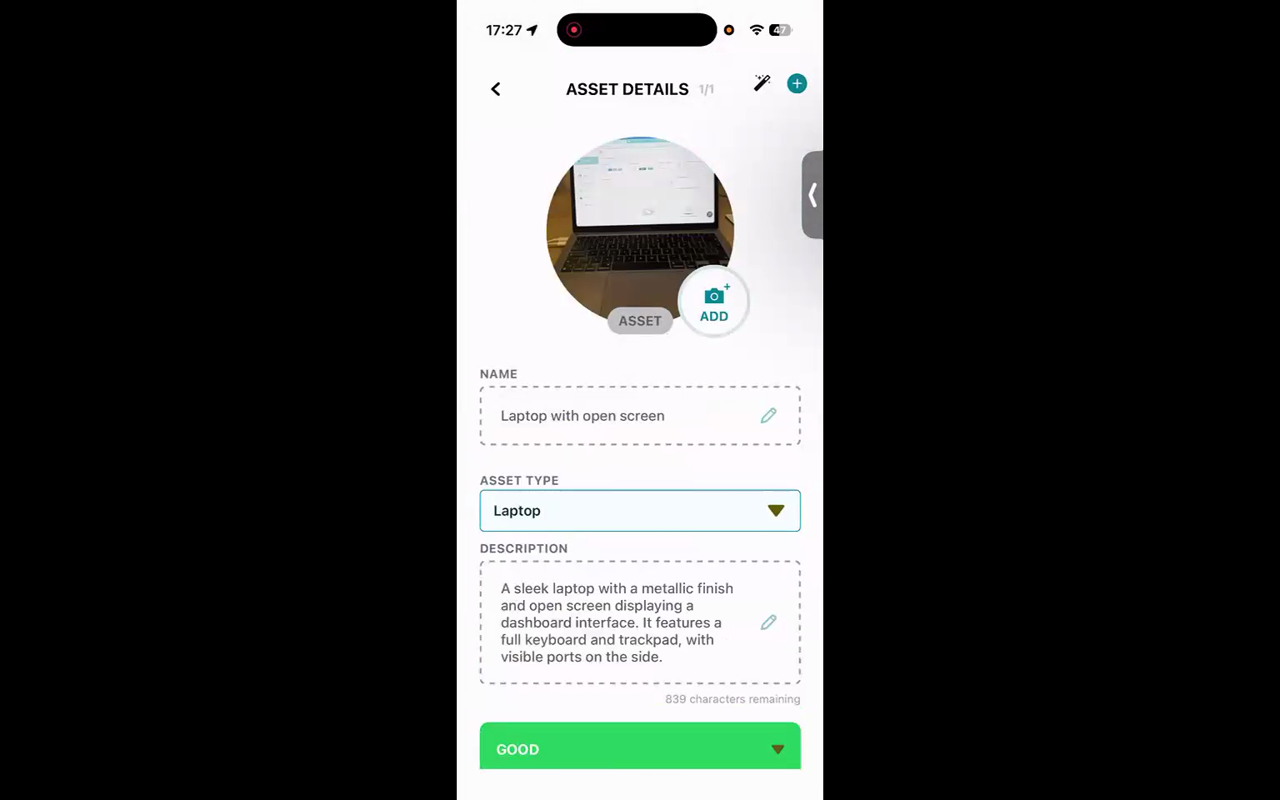
Civic.ly will now process the photo. The AI analyses the image and automatically assigns an asset type (for example, "Laptop Computer" or "Litter Bin"), writes a description, and gives a condition rating. This takes a few seconds.
Once processing is complete, pull down to refresh the asset list. You should see your new asset appear. Tap on it to see the full details — the name, asset type, description, and condition the AI has assigned.
Check the Map in the Web App
- Switch to the web app on your computer (log in at your Civic.ly URL if you are not already).
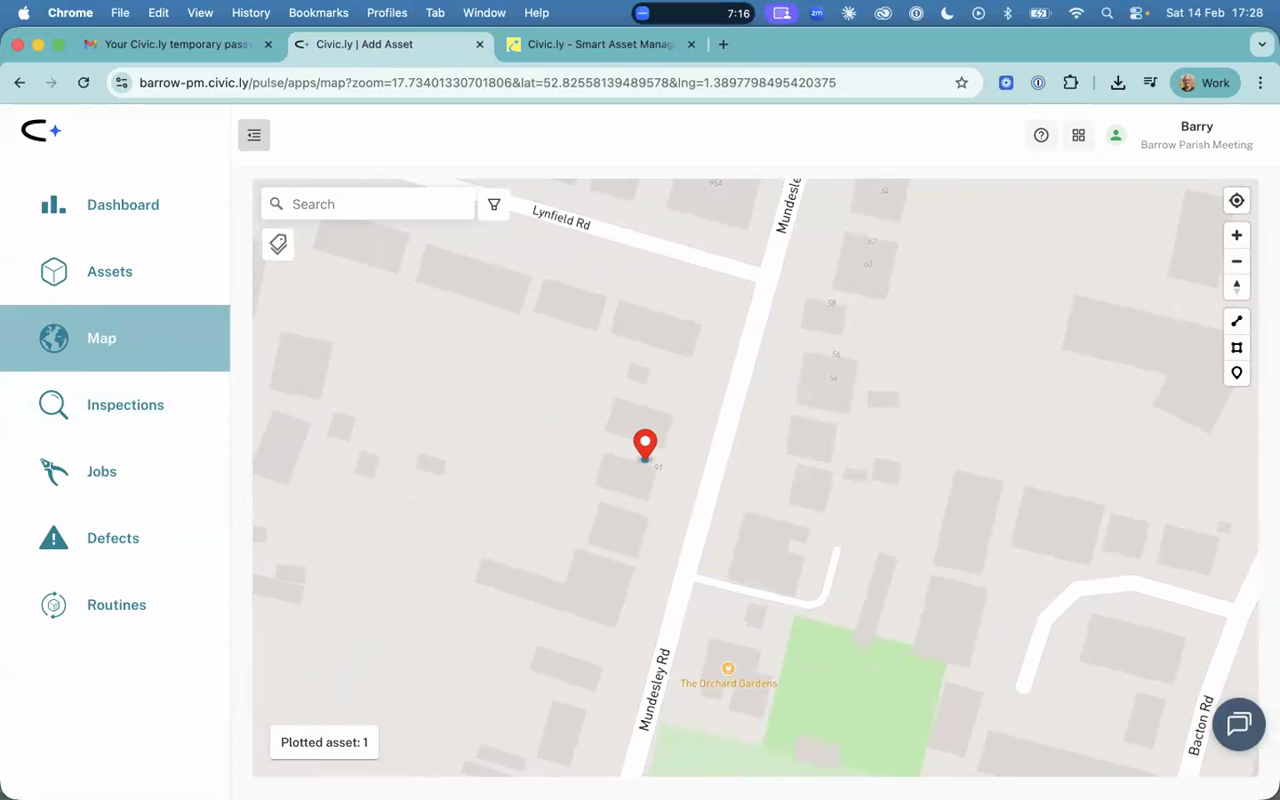
- Click Map in the left-hand menu.
- You should see your asset plotted on the map at the location where you took the photo.
If the pin is in the right place, your phone's GPS and permissions are working correctly. This is worth checking now — if the location is wrong, it is usually a permissions issue that is easier to fix before you start adding real assets.
- Take photos with your camera app first, then upload via Gallery. You can take photos from inside the Civic.ly app, but it is much faster to use your phone's camera directly — you can snap photos one after another without waiting for each one to upload. When you are ready, open the Civic.ly app, tap + > Asset > Gallery, and select multiple photos at once. This is the recommended workflow when you are out in the field adding lots of assets.
- Take one photo indoors and one outdoors (like a lamppost or bin in the street). This lets you see two different map locations and confirms GPS is working properly.
- Do not worry about getting the AI results perfect at this stage. When you add your real assets later, you can review and adjust the AI's suggestions in the web app.
- Frame the whole asset clearly. Get close enough that the asset fills the photo, but far enough back that the whole thing is in shot. Avoid capturing other assets in the background — if there is a bin next to a bench, photograph each one separately. Avoid shooting into the sun, and do not take photos from inside a car. The AI analyses the image for type, condition, and description, so a clear, well-framed photo gives the best results.
- Give your GPS a few seconds between photos. If you are photographing several assets close together, do not rush from one to the next. The GPS needs a moment to update your position. Taking photos too quickly — within a few seconds of each other — can cause multiple assets to map to the same spot.
- Upload on Wi-Fi when you can. You can take photos all day and upload them later when you are back on a good connection. The app lets you upload up to 10 photos at a time.
Common Questions
This usually means the username or password is incorrect. Double-check both, paying attention to uppercase and lowercase letters. Try logging in to the web app first to confirm your details work.
The location comes from your phone's GPS at the time the photo was taken. If you were indoors, GPS can be less accurate. Make sure location services are enabled for the Civic.ly app and for your camera. Try taking a photo outdoors to test.
Yes. For this quick start you do not need to fix it, but when you add real assets later, you can edit any field in the web app. Open the asset, change the type or description, and save.
No. Taking a photo is the recommended way because the AI automatically classifies the asset, maps it using GPS, and you get a visual record of its condition. But if you prefer, you can add assets manually via the map in the web app — just plot them by hand and fill in the details yourself. You can always add a photo later.
Several things happen automatically. The AI identifies what the asset is and assigns an asset type. It writes a description, gives a condition rating, and assigns a What3Words address. If the asset falls inside an area you have already drawn on the map, it is automatically tagged with that area name. All assets start in Draft status — leave them there until you have reviewed the AI results and fine-tuned the map positions.
Yes. Open the asset's full record, scroll down to see its location on the map, then use the area drawing tool on the right-hand side to draw a boundary around it. The asset will keep its photo and details but now appear as an area instead of a point. You can do the same with linear features like fences — draw them as a line instead.
Your asset is on the map and described by AI. Now let's create an inspection for it.