You need a defect in Civic.ly. If you have not created one yet, follow Create a Defect first.
This is the final step in the quick start. You will create a job to fix your defect, complete the job, mark the defect as fixed, and then see the full audit trail in the web app — from asset to inspection to defect to job, all linked together.
Create a Job from the Defect
You can create a job from either the web app or the mobile app. Here we will use the mobile app, since that is where your grounds team would typically be.
On the Mobile App
- Open the Civic.ly app on your phone.
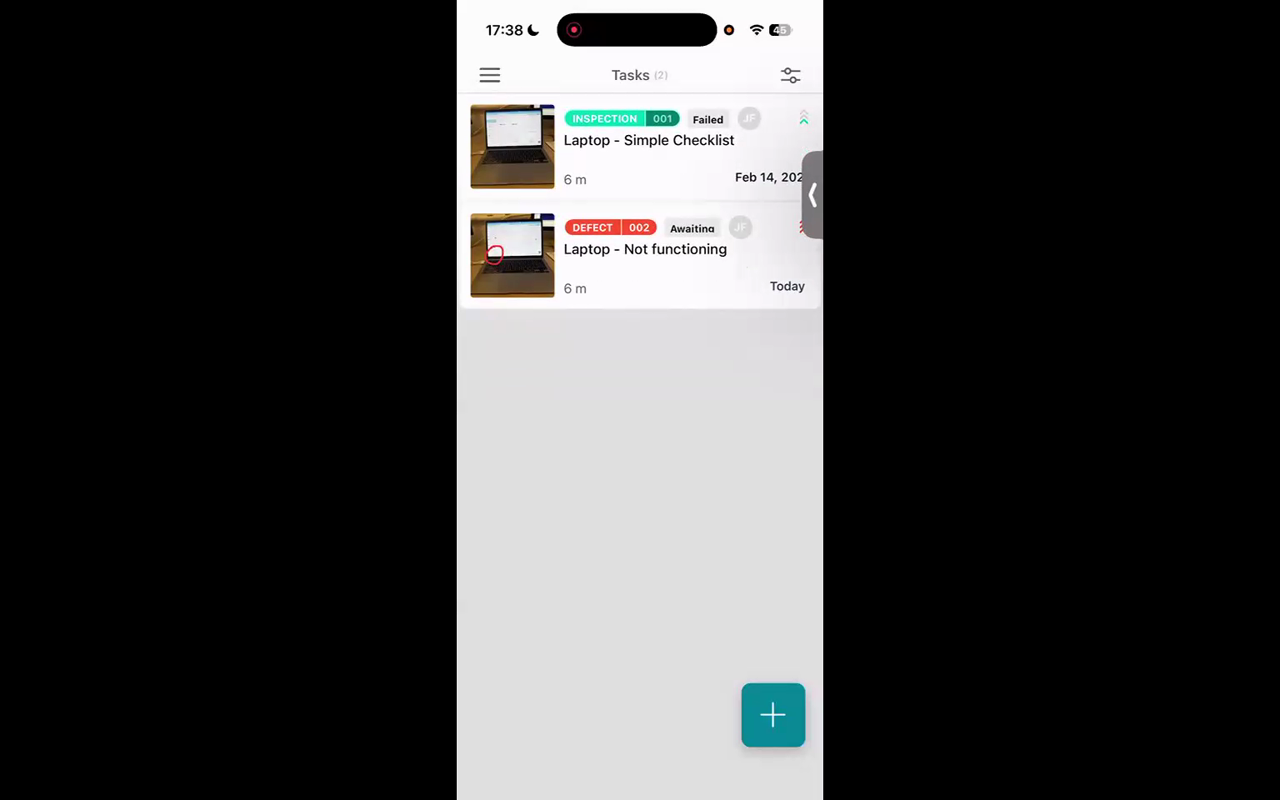
- Find the defect in your task list (make sure you are in the Tasks view, not Assets).
- Tap on the defect to open it.
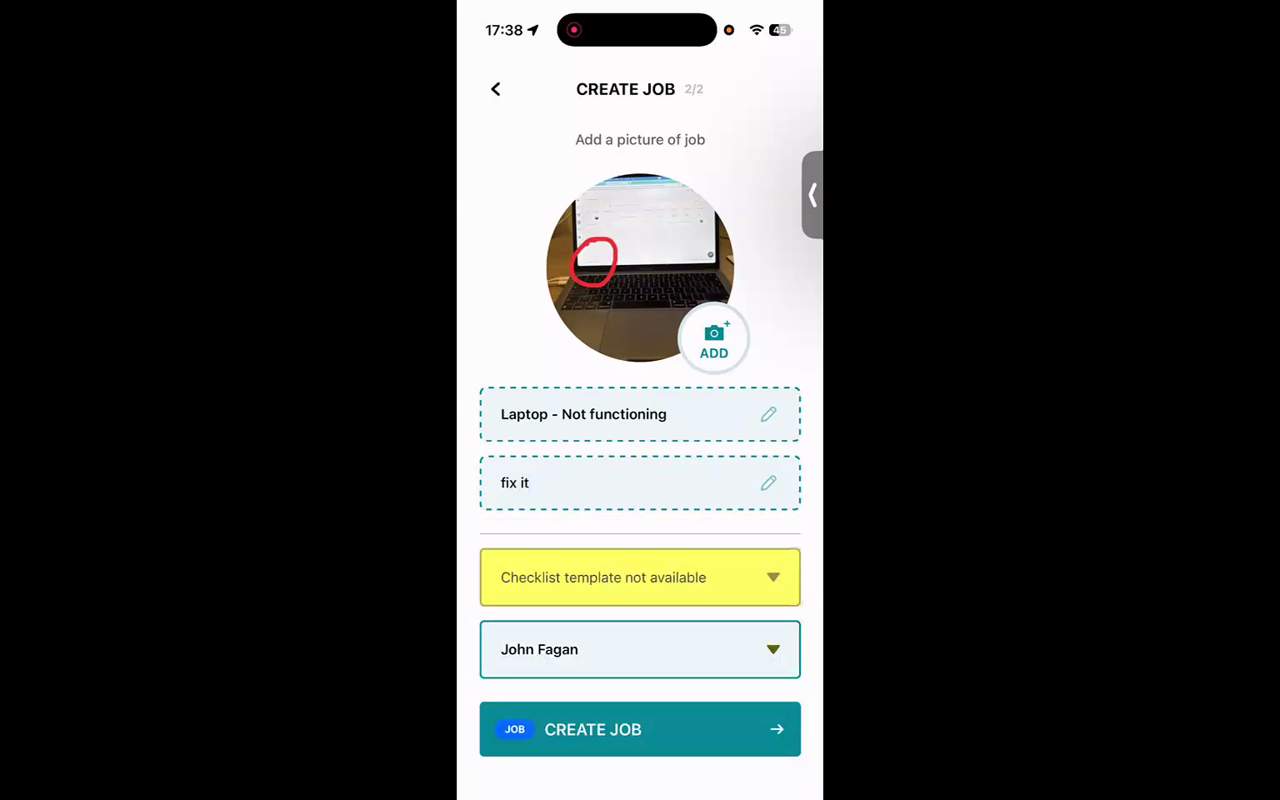
- Tap the + button in the top right-hand corner.
- Select Create Job.
- Update the description if you want — for example, "Replace cracked screen" or "Fix the issue".
- Tap Create to save the job.
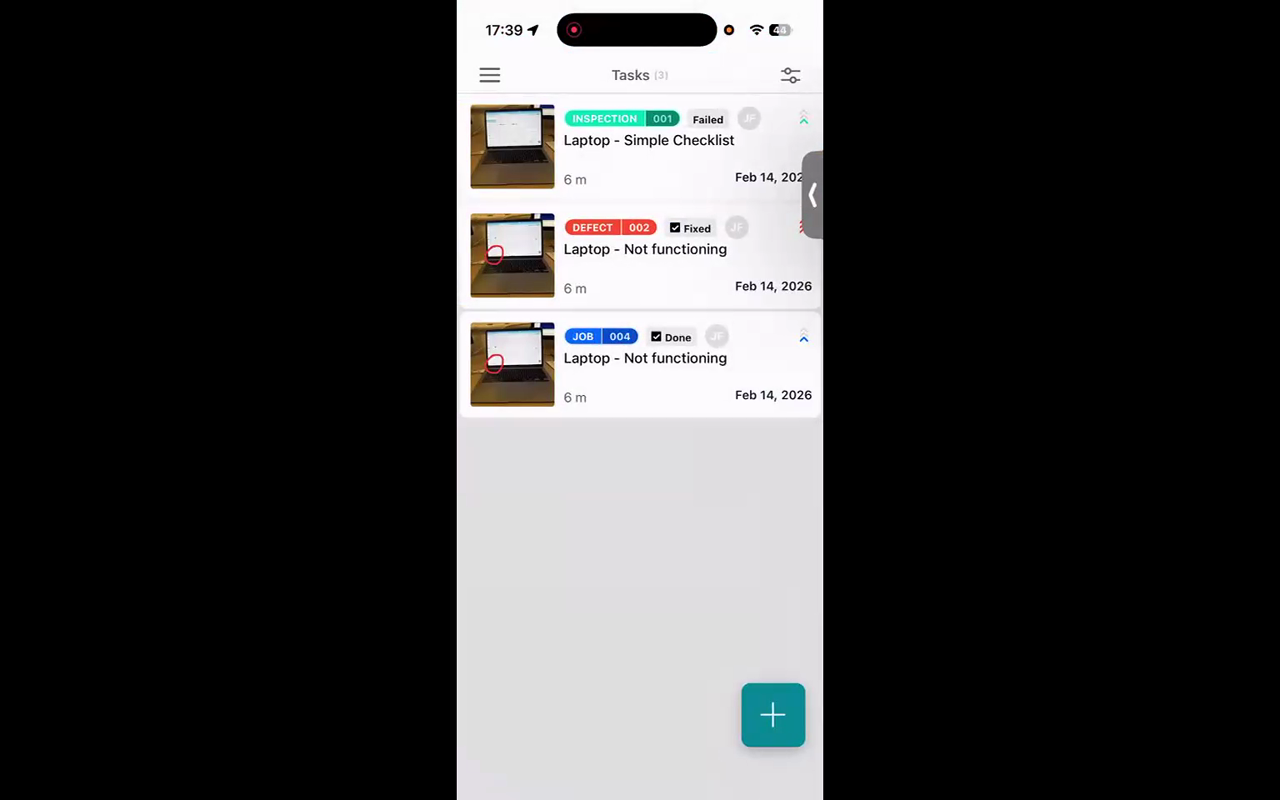
The job is now created and linked to the defect.
Complete the Job and Close the Defect
- Still on the mobile app, find the job in your task list.
- Open it and mark it as Done.
- Go back to the defect and mark it as Fixed.
That is the full cycle complete — from finding a problem to fixing it, all tracked.
See the Full Audit Trail in the Web App
- Switch to the web app on your computer.
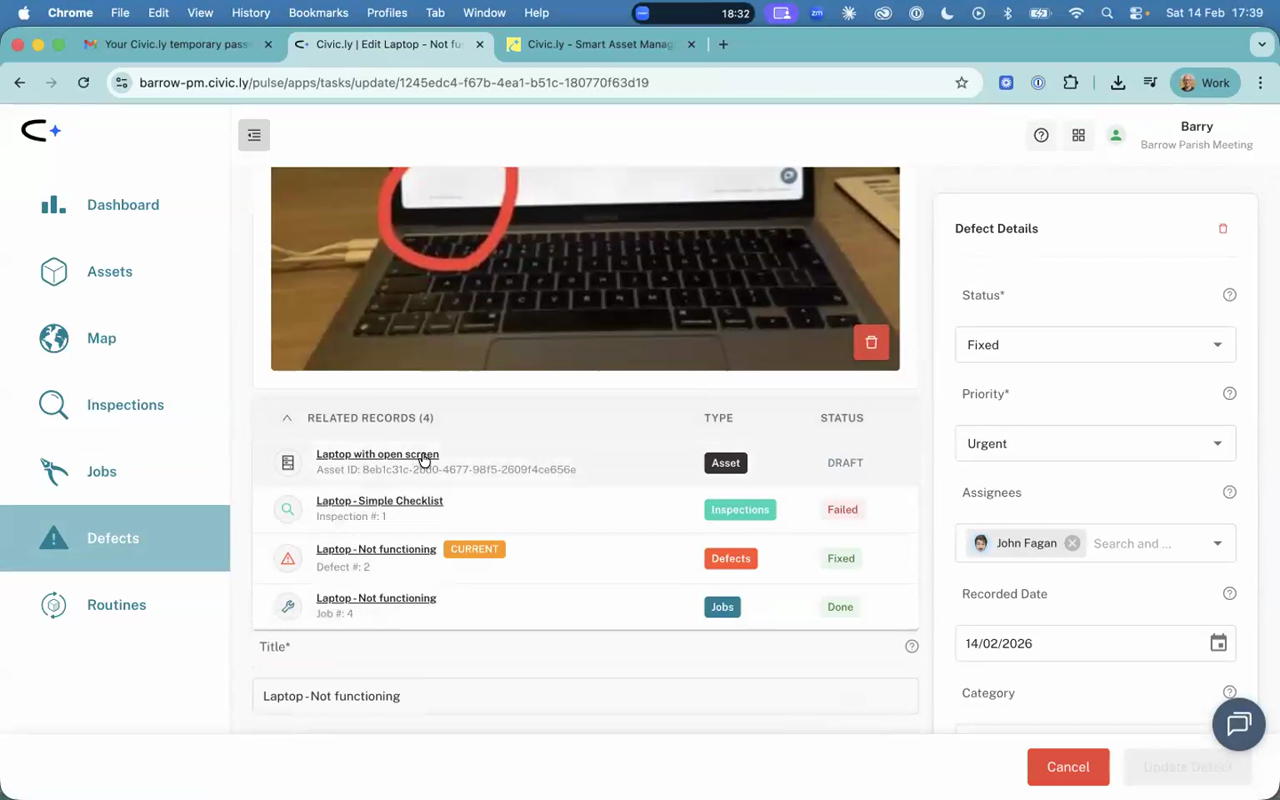
- Click Defects in the left-hand menu. If completed items are hidden, switch the filter to show all tasks.
- Open your defect — you will see it is marked as fixed.
- Look at the Related Records section. You will see everything linked together: the asset, the inspection (which failed), the defect (with photo and annotation), and the job that fixed it.
This is the audit trail. For every asset your council manages — playground equipment, buildings, paths, anything — you will have a complete history of what was inspected, what problems were found, and what was done to fix them. This is exactly what you need for compliance, insurance, and good governance.
- In real use, a single defect might need more than one job to resolve — for example, a temporary fix followed by a permanent repair. You can create multiple jobs linked to the same defect.
- Managers typically review defects in the web app and assign jobs to specific people. Field staff see their assigned jobs on the mobile app.
Common Questions
Yes. Open the defect in the web app, click the three-dot menu, and select Create Job. This is the typical workflow for managers — review defects in the web app and assign jobs to team members.
Now that you have seen the full workflow, you can delete the test asset, inspection, defect, and job. Select them in the web app and use the delete option. Then you are ready to start adding your real assets.
You have seen the complete Civic.ly cycle. The next steps are to map your council's areas (parks, playing fields, buildings), then walk around and photograph your real assets. See the full onboarding guide for the recommended order.
You Have Completed the Quick Start!
You have experienced the full Civic.ly workflow: adding an asset with AI, inspecting it with a checklist, raising a defect with an annotated photo, and creating a job to fix it. Everything is connected and everything is tracked.
Delete your test data when you are ready, and start adding your real assets. Good luck!