You need an inspection with at least one failed checklist item. If you have not done this yet, follow Create and Complete an Inspection first.
In this step you will raise a defect from a failed inspection item, take a photo of the problem, draw on the photo to highlight exactly what is wrong, and then check the results in the web app. This is how your team reports issues they find during inspections.
Raise a Defect from the Mobile App
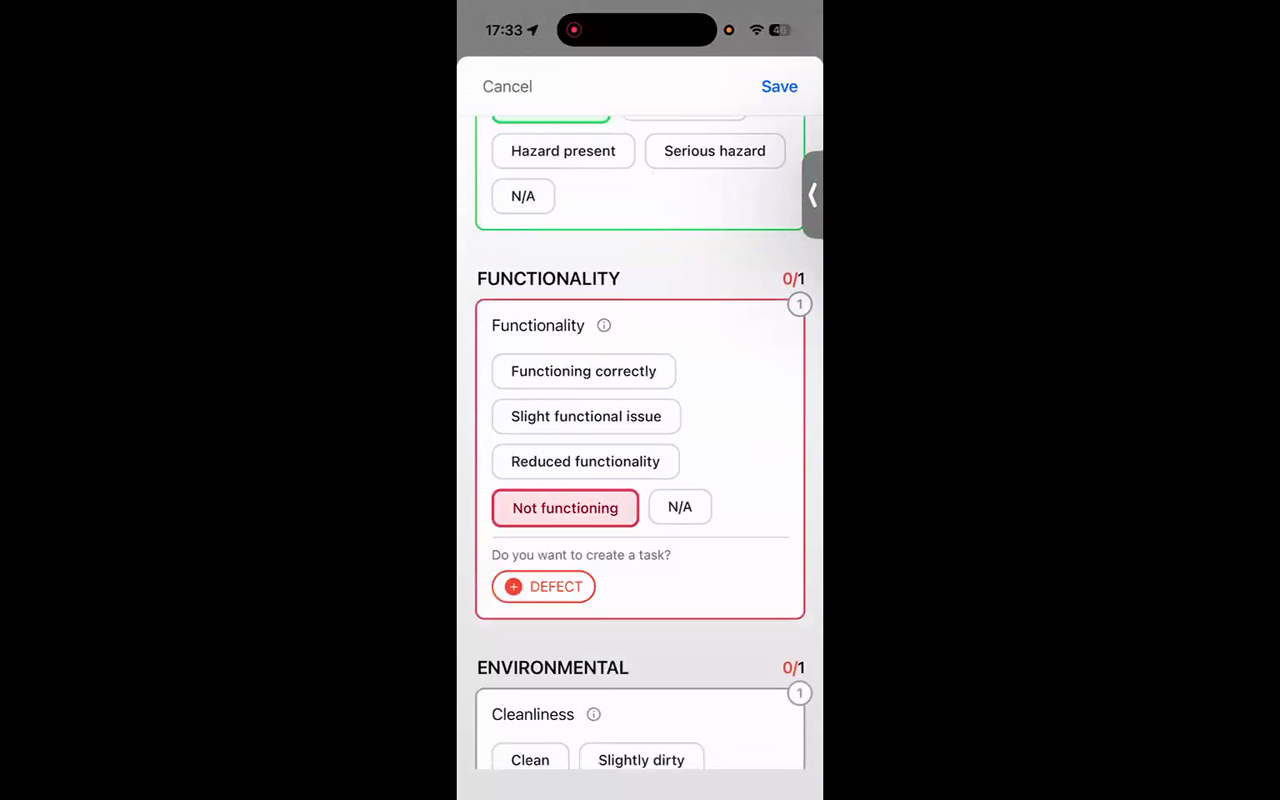
- You should still be in the inspection checklist on your phone from the previous step. Find the item you marked as failed or poor.
- When you give a checklist item a failing response, a Defect button appears. Tap it.
- On the Create Defect screen, tap Add Photo.
- Tap Camera to take a new photo of the issue (or choose an existing photo from your gallery).
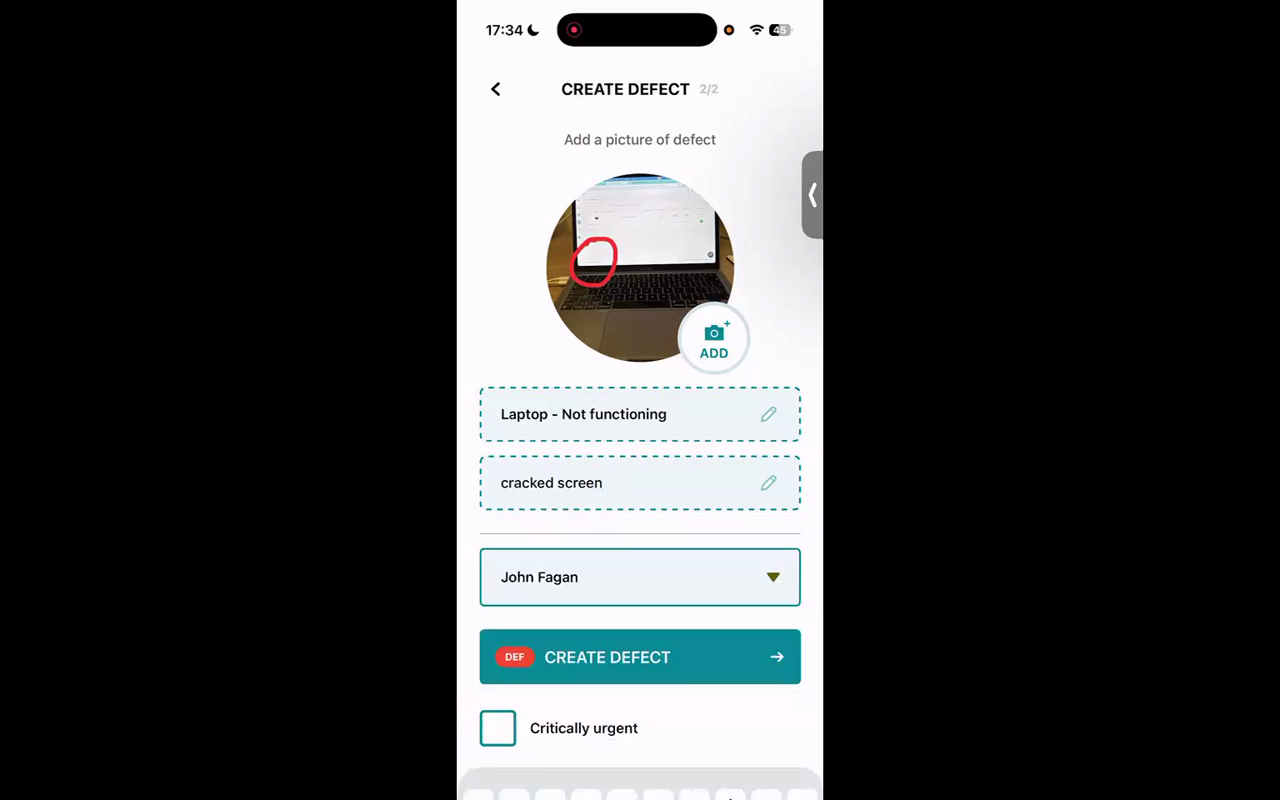
- After taking the photo, you can draw on it to highlight the problem — for example, circle a crack, an area of damage, or anything you want to draw attention to. Use your finger to draw directly on the image.
- Add a description of the defect — for example, "Cracked screen" or "Broken hinge". Keep it short and clear.
- Set the priority — for this test, try setting it to Urgent so you can see how priorities work.
- Tap Create to save the defect.
The defect is now logged with a photo, annotation, description, and priority — all linked back to the inspection and the asset.
Check the Results in the Web App
- Switch to the web app on your computer.
- Click Inspections in the left-hand menu. If you have the "hide completed" filter on, switch it to show all tasks so you can see the completed inspection.
- Open the inspection — you will see which items passed and which failed.
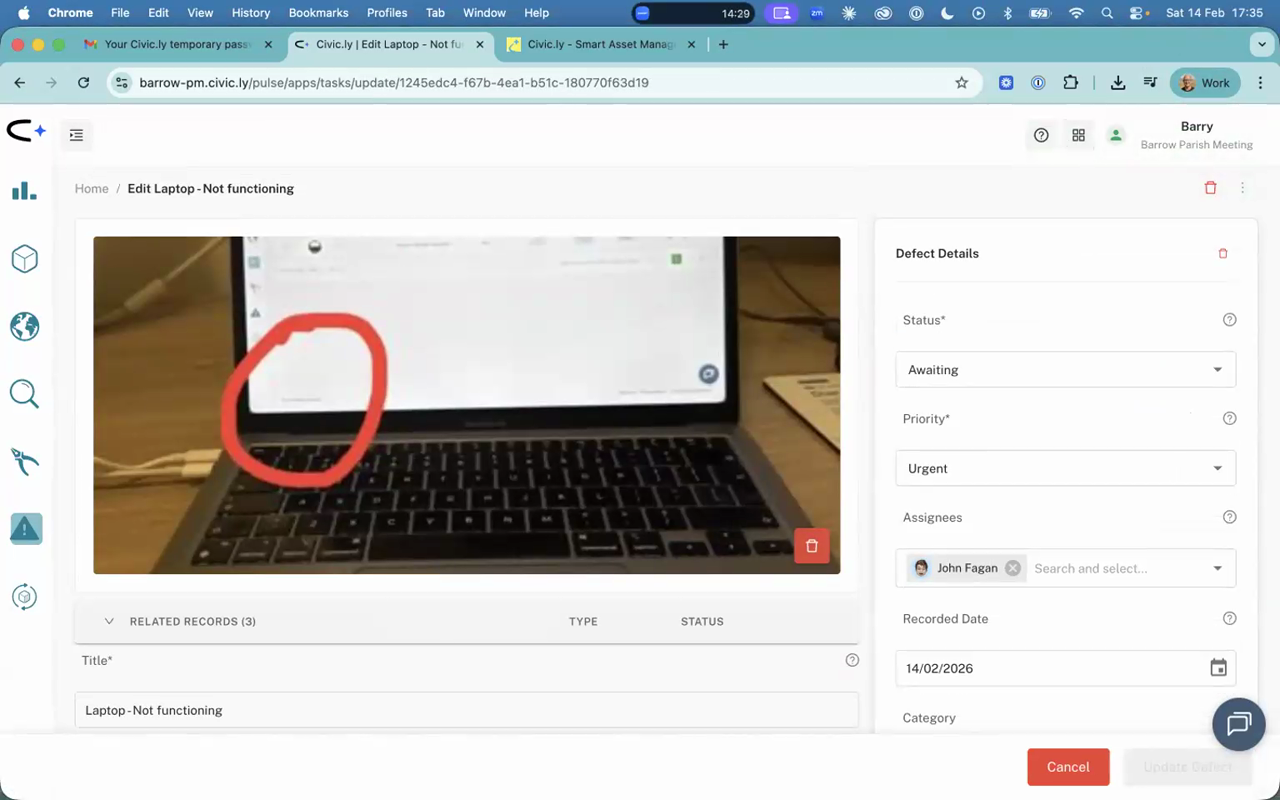
- In the Related Records section, you will see the defect that was created. Click on it to view the details.
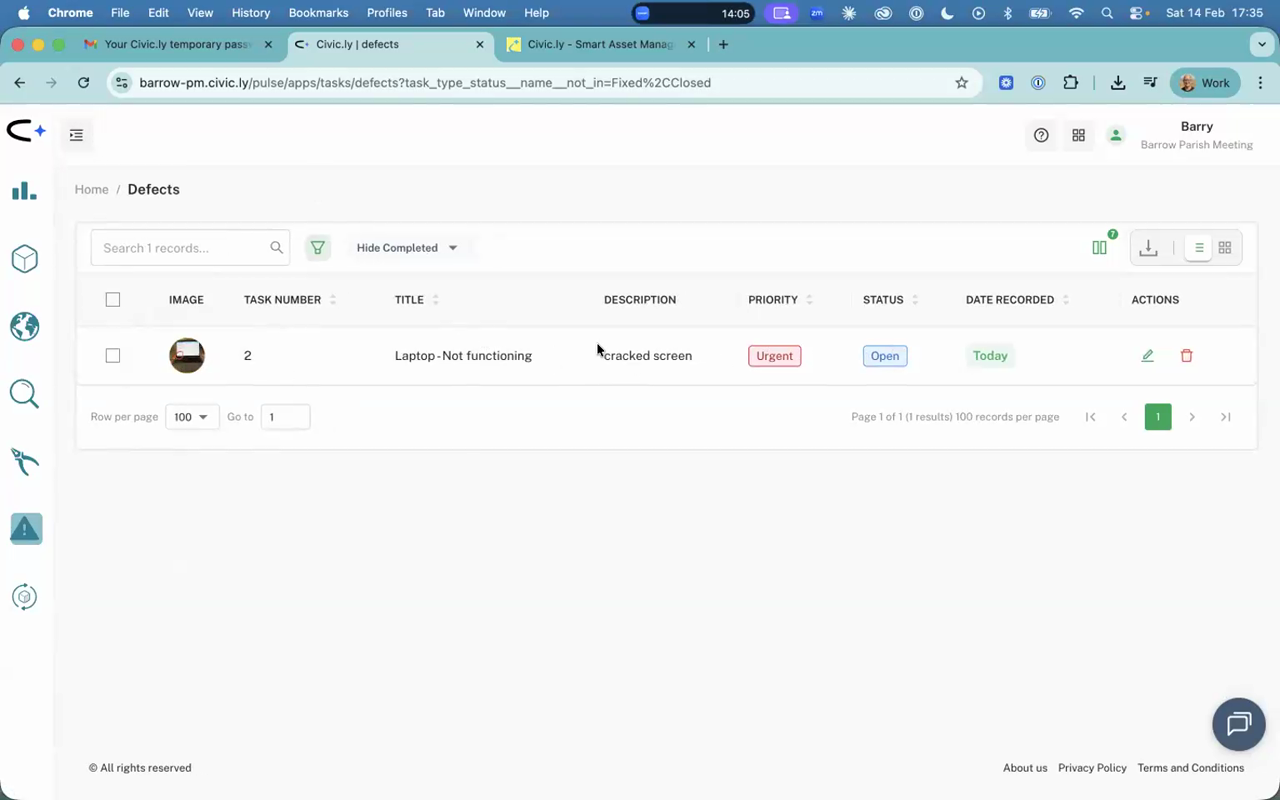
- You can also click Defects in the left-hand menu to see all defects in one place. Your new defect will be there with the photo, drawing, description, and priority you set.
Everything is linked together — the asset, the inspection, and the defect. This is the audit trail that matters for compliance and insurance.
- Drawing on photos is a powerful way to communicate exactly where a problem is. This is especially useful when reporting issues to someone who cannot visit the site immediately.
- You can create defects outside of inspections too — using the + button on any asset. But raising them during inspections keeps everything connected in the audit trail.
- Set priorities consistently across your team. Urgent defects should be things that pose an immediate safety risk or need same-day attention.
Common Questions
Not yet — each defect currently supports a single photo. Multiple photos per defect is a planned feature. You can vote for it and track progress at ideas.civic.ly.
The defect appears in the web app immediately. Office staff or managers can review it, update its status (for example, to "Waiting for fix"), and create a job to fix it — which is exactly what we will do in the next step.
You cannot edit the drawing after the defect is saved. If you need a different annotation, delete the defect and recreate it. Alternatively, you can use your phone's built-in camera and drawing tools to annotate a photo yourself, then replace the image on the defect.
You have a defect logged with a photo and annotation. Now let's create a job to fix it.