Make sure you've set up your Civic.ly account — you need access to the web app to draw areas on the map.
Areas are assets that represent a boundary on the map — things like parks, playgrounds, tennis courts, bowling greens, woodlands, and building outlines. This article shows you how to draw areas, fill in their details, and organise them on the map. It's aimed at clerks and grounds staff setting up Civic.ly for the first time.
Why Create Areas?
There are two reasons to create areas in Civic.ly.
Areas are assets in their own right. Not everything you maintain is a single point on the map. A park, a playground, or a tennis court is a space — and you need to assign inspections and jobs to it just like any other asset.
Areas group individual assets together. When you draw an area on the map, any assets you add later (by uploading photos) that fall inside that boundary are automatically tagged with the area name. This makes it easy to filter your asset register and find everything in, say, "Memorial Park" in one go.
Because of this automatic grouping, it is best practice to create your areas before you go out and photograph individual assets. That way, every bench, bin, and piece of play equipment you photograph gets assigned to the right area straight away. You can do it afterwards, but doing it first saves time.
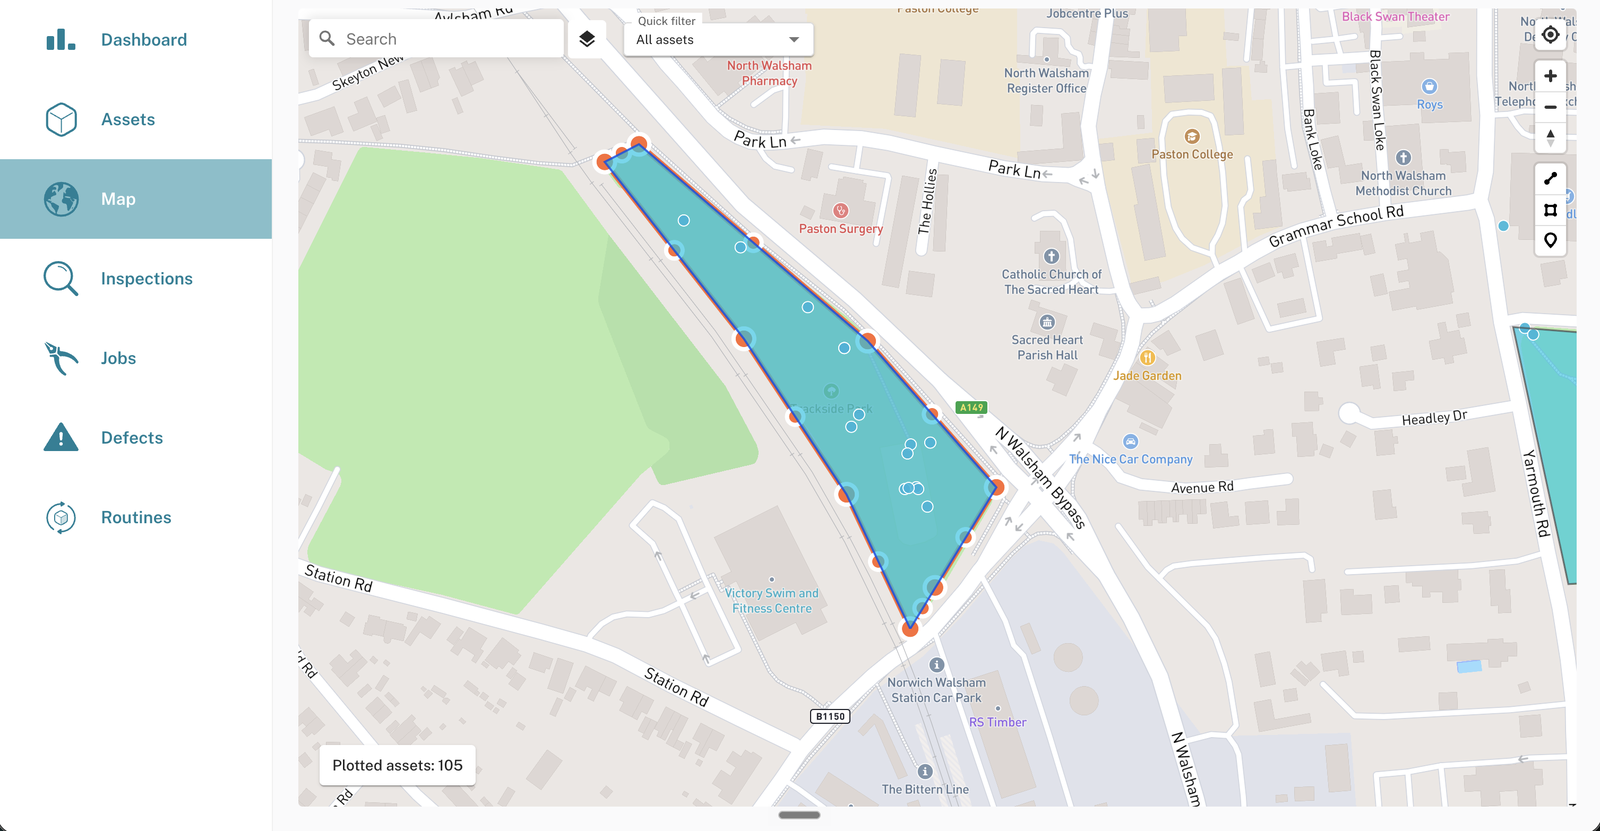
Step-by-Step: Drawing an Area
- Open the Map from the left-hand menu in the web app. If you are new to the map, see Overview of Using the Map for a tour of the interface.
- Navigate to the location where you want to draw your area. You can zoom in and out using the scroll wheel or the zoom tools on the right. Switching to Satellite or Ordnance Survey view (in Layer Controls → Map Style — Ordnance Survey only appears once you're zoomed in close) can help you trace boundaries more accurately.
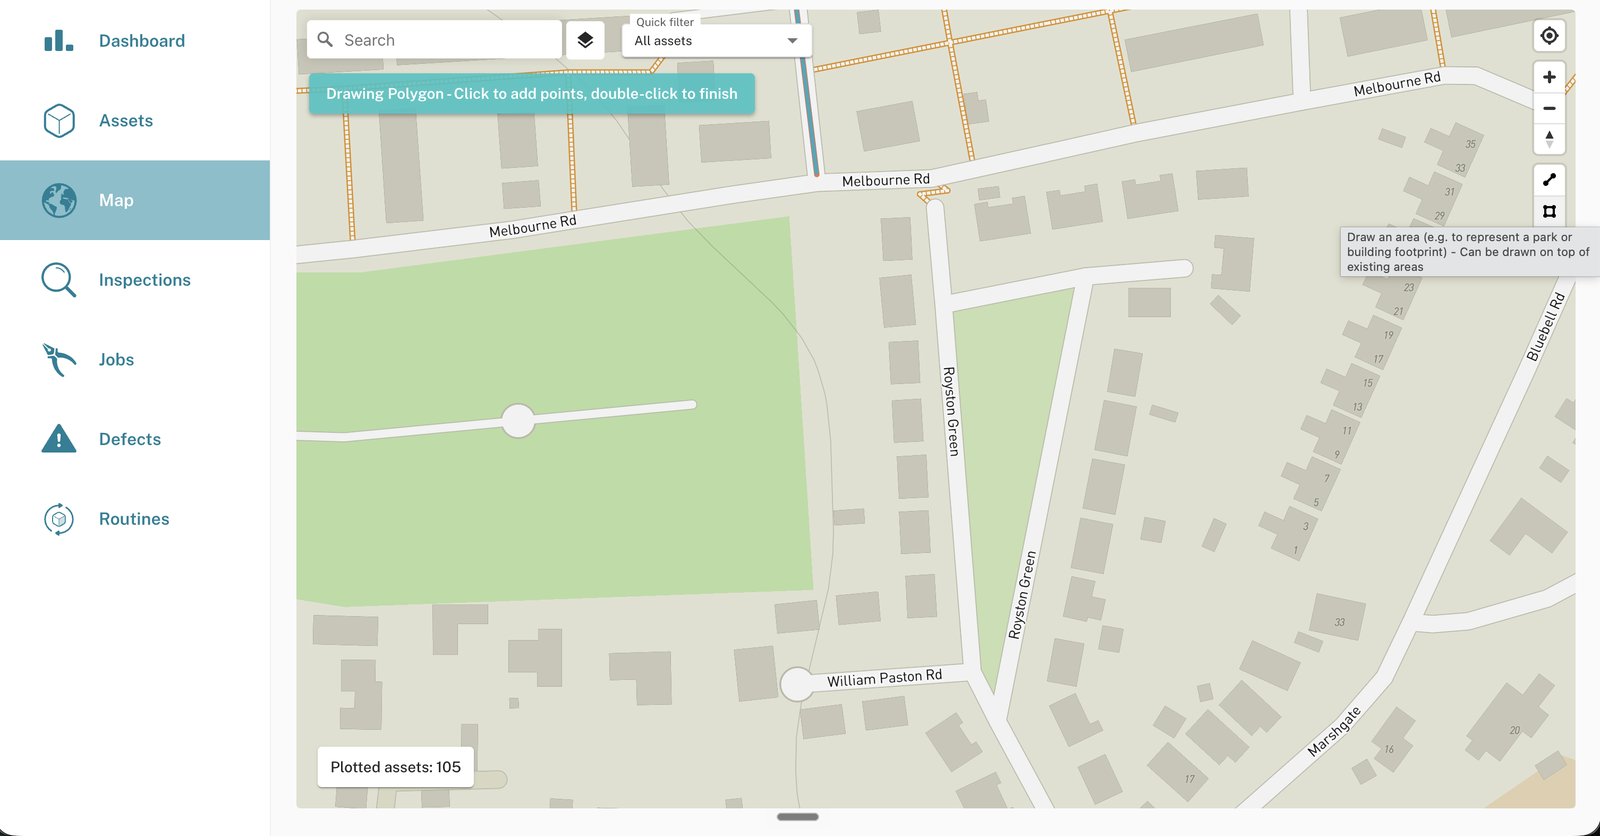
- On the right-hand side of the map, find the drawing tools. Click the area (polygon) tool — it looks like a shape icon.
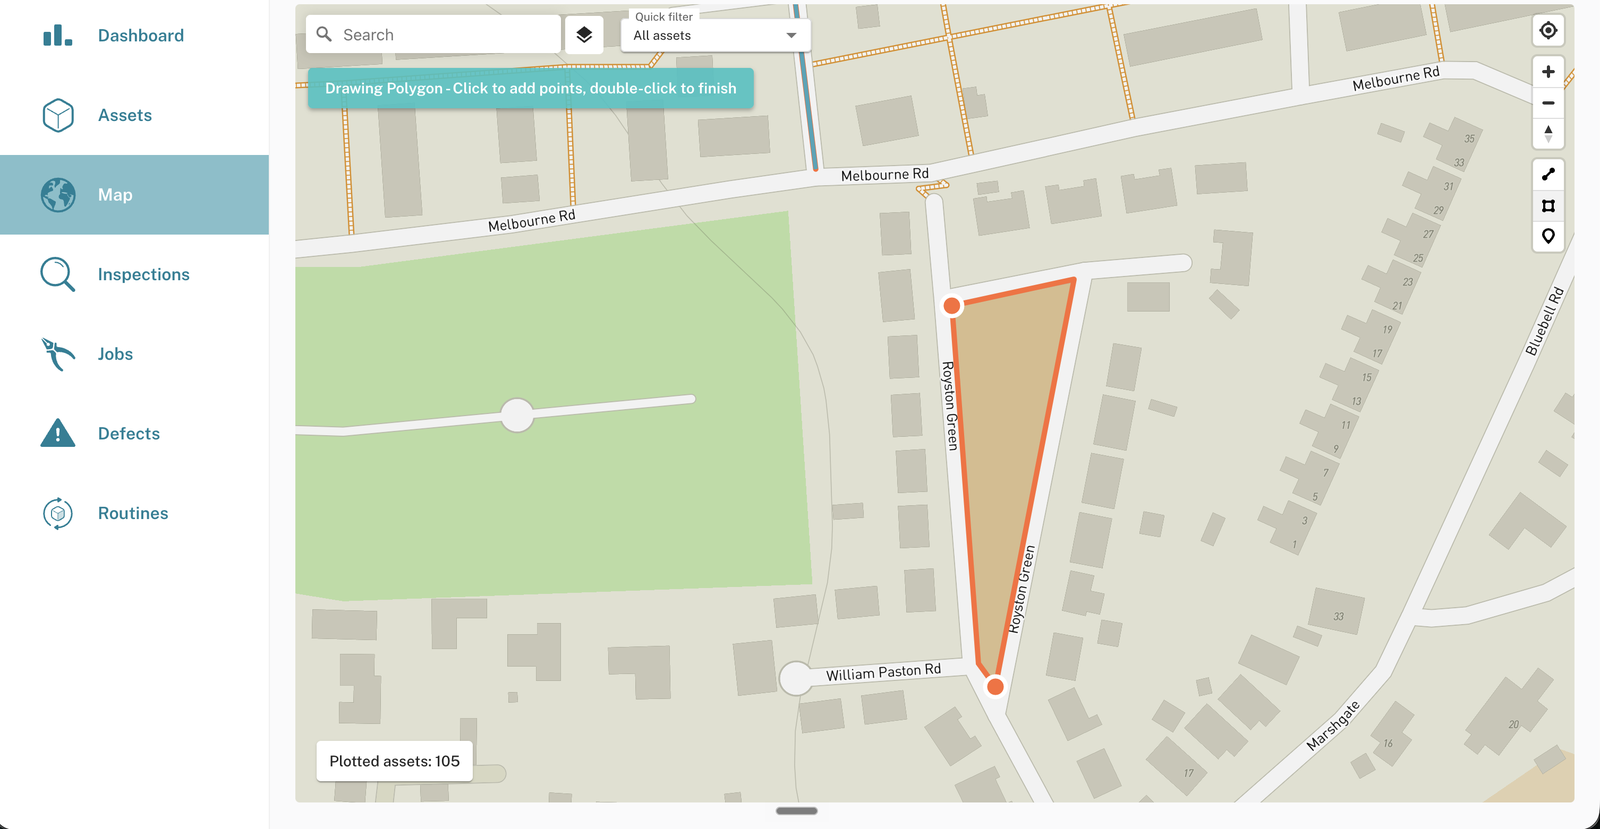
- Click on the map to place your first corner point. Then keep clicking to place each additional corner point, tracing around the boundary of the area. You can zoom in and drag the map while drawing — it will not drop extra points when you drag.
- When you reach your last point, double-click to close the shape. The side drawer will open automatically on the right.
Step-by-Step: Filling in the Details
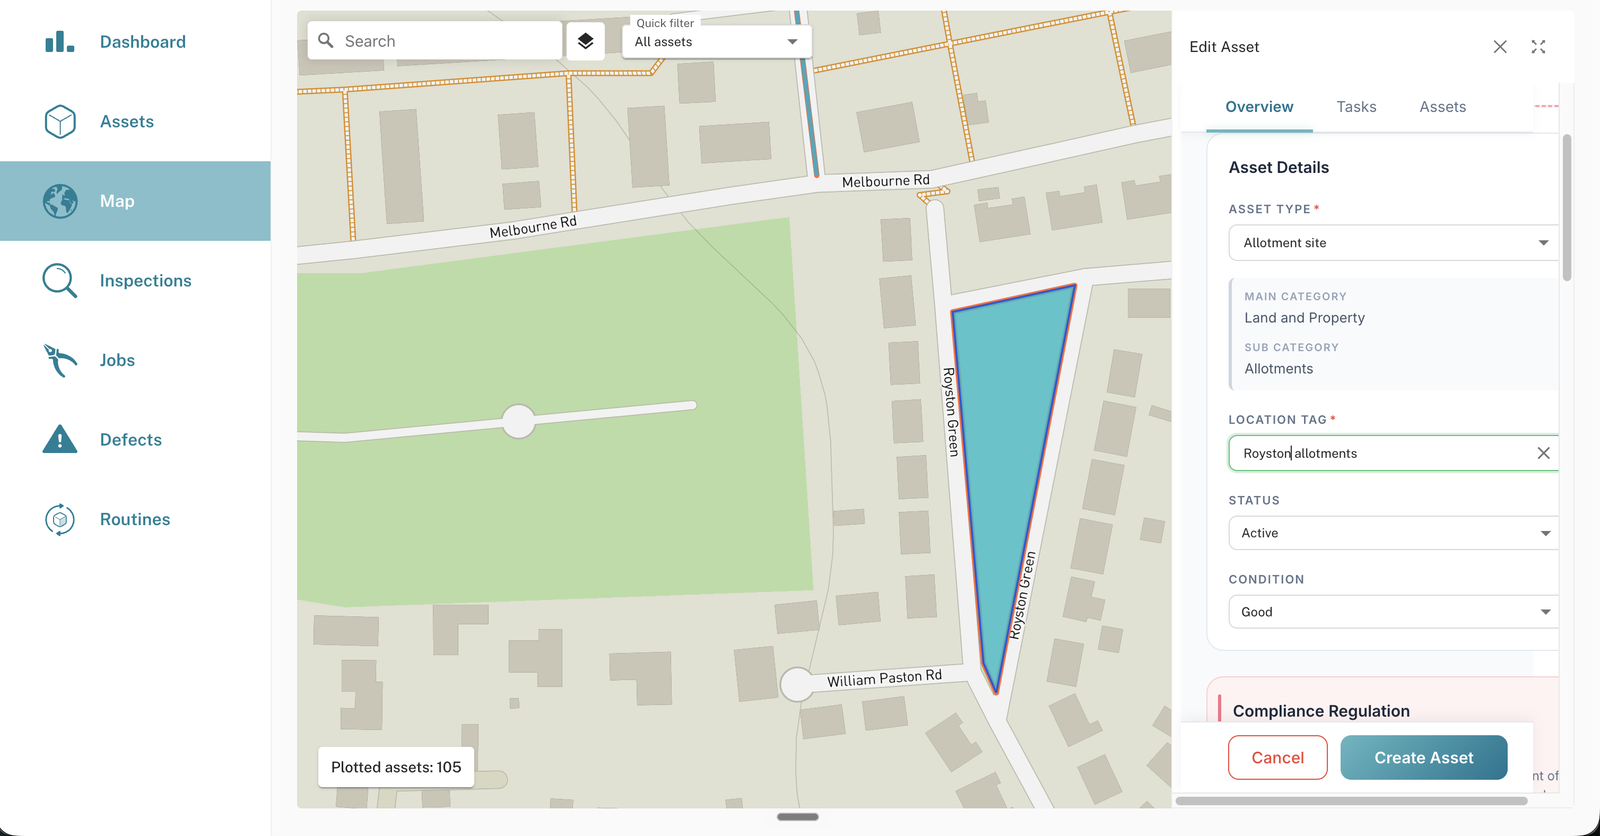
- In the side drawer, type a Name for the area (for example, "Memorial Park Tennis Court").
- Choose an Asset Type by typing a keyword and selecting from the list. This is the only time you need to set the asset type manually — when you add assets by uploading photos, the AI does this for you.
- Set the Status to Active.
- Important: set the location tag. Copy the area name you just typed into the Location Tag field, which sits just below Asset Type in the drawer. It is a required field, so the form will stop you saving without it, but it will happily take something that is not the area name. This is what links future assets to this area, so make it match.
- Click Save.
Step-by-Step: Editing and Organising Areas
Once your area is saved, you can click on it at any time to adjust its shape. When you make a change, Save and Cancel buttons appear next to the search bar at the top of the map. Nothing is written to your register until you click Save, and Cancel puts the map back as it was.
Where you drag from decides what moves: drag an individual corner point and only that corner moves, which is how you fine-tune a boundary, but drag from the middle of the shape and the whole area moves. Lines behave the same way, which is worth knowing if you draw streets, paths, hedgerows or verges. Individual pins are simpler still: click and hold on the pin and drag it, with no need to select it first.
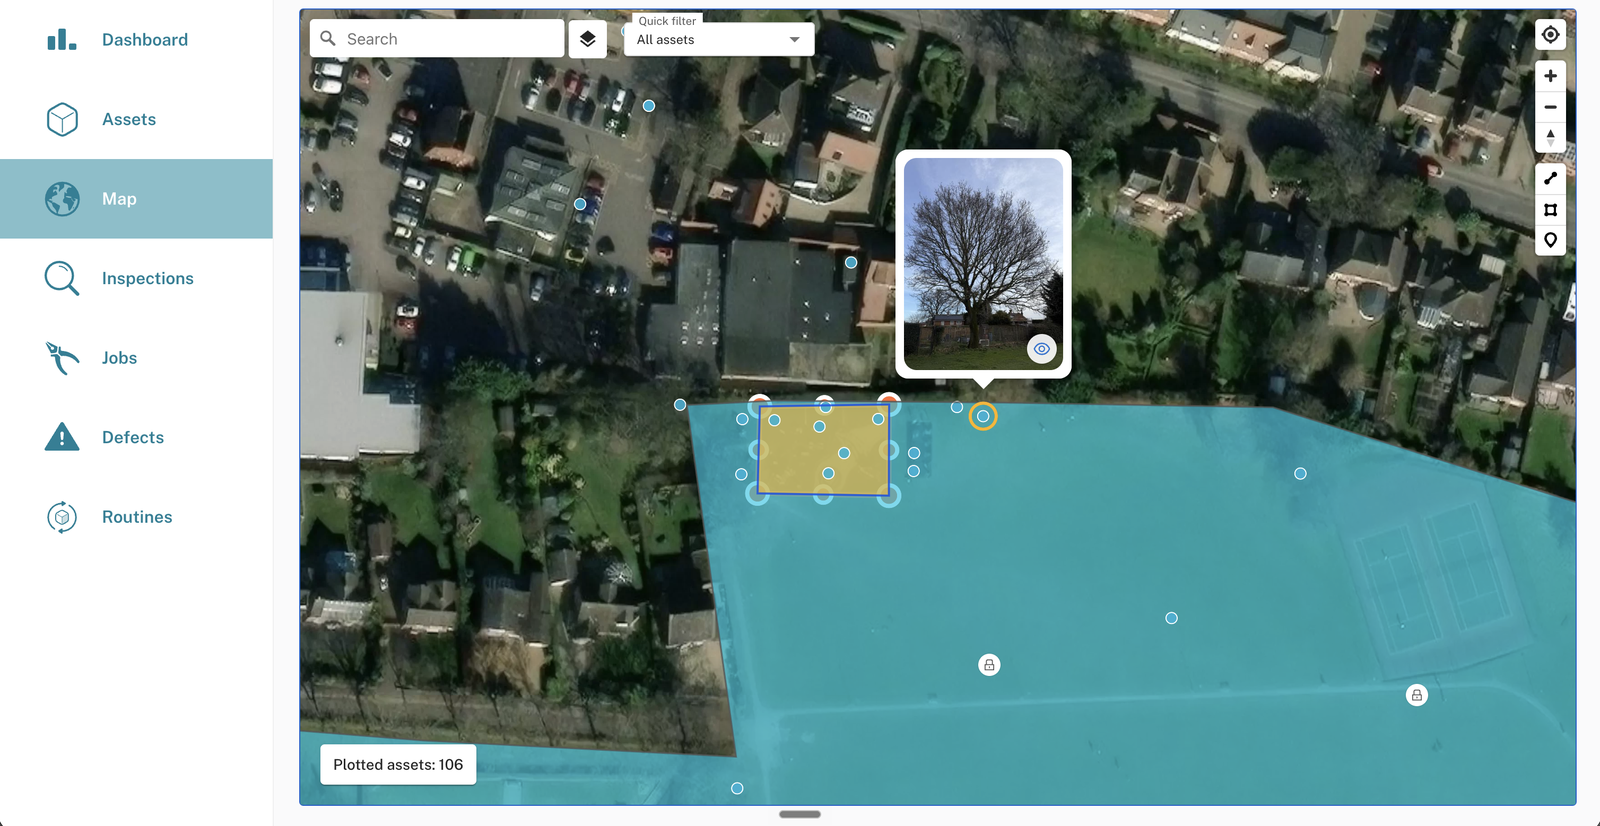
If you have a smaller area inside a larger one (for example, a tennis court inside a park), draw the smaller areas first. When you add the larger area, it may sit on top of the smaller ones. To fix this:
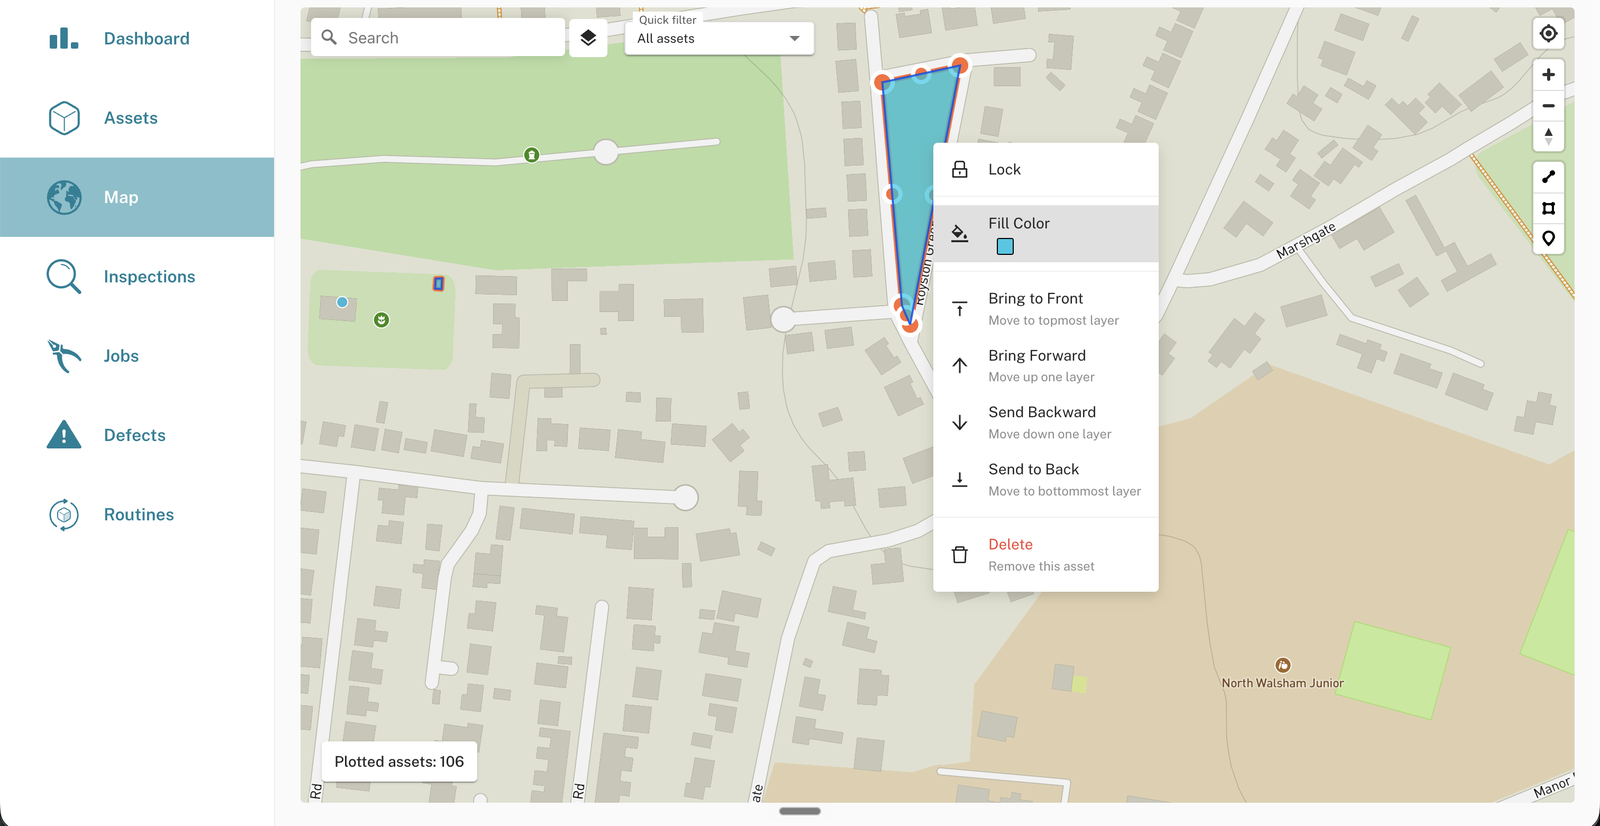
- Right-click on the larger area to open the context menu.
- Choose Send to Back to move it to the bottommost layer, behind the smaller areas.
- You can also change an area's Fill Color from the same menu, to make overlapping areas easier to tell apart.
- Once you are happy with an area, select Lock to prevent accidental edits.
The menu gives you four layering options rather than two, which matters once you have more than two shapes stacked. Bring to Front and Send to Back jump an area to the top or bottom of the pile, while Bring Forward and Send Backward move it one layer at a time, which is what you want when a park contains a playing field which in turn contains a play area. Delete removes the asset entirely.
- Create areas before photographing assets. If the areas are already drawn when you upload photos, the AI automatically assigns each asset to the correct area.
- Think about how your team refers to places. If your grounds staff talk about "the children's play park" and "the memorial gardens" as separate spaces, draw them as separate areas — even if they are inside the same park.
- Draw sub-areas first, then the main area. This keeps smaller areas selectable on top.
- Lock areas you are happy with to stop yourself accidentally moving them during other map edits.
- You can upload a photo later. Areas do not come with a photo by default, but you can add one at any time — try taking a wide shot that shows the whole space.
- Use the area tool, not the line tool. A line does not close into a shape. Select the area (polygon) tool — not the line icon.
Common Questions
No, but it is strongly recommended. If your areas are already on the map when you upload photos, the AI will automatically tag each asset with the correct area name. If you create areas afterwards, you would need to assign existing assets to them manually.
Yes. For example, you could draw a "Memorial Park" area for the whole park, and also draw smaller areas for the tennis courts, play park, and memorial gardens within it. Draw the smaller areas first, then send the larger area to the back so you can still click on the smaller ones.
The location tag is a label that connects assets to an area. When you create an area, you must copy the area name into the Location Tag field. This is how Civic.ly knows to group assets that fall inside that boundary under the area name. Without it, the automatic grouping will not work.
Yes. Click on the area to select it, then drag the corner points to adjust the shape. You will see Save and Cancel buttons appear at the top of the map. If you have locked the area, right-click and choose Unlock first.
Right-click on the area and choose Delete to remove it, then draw it again. Or simply click on it and drag the corner points to reshape it.
Click Cancel next to the search bar and the map goes back to how it was, as long as you have not clicked Save. Bear in mind Cancel discards every unsaved change on the map, not just the last one. Then select the area again and drag the individual corner point rather than the middle of the shape. Saving as you go keeps that choice small.
The likely cause is a stray double-click. A single click places a corner point, but a double-click anywhere ends the shape and opens the side drawer — so on a complicated boundary, where you are placing points quickly, two clicks landing close together will close the area early. Click Cancel next to the search bar to discard the part-drawn shape and start again. Two things make irregular boundaries easier: zoom in and place points in short runs, panning the map between them rather than tracing at a wide zoom; and place points at the corners that matter rather than every wiggle, since you can move or add corners later by dragging them on the saved area. If the same shape keeps closing early, send us a screenshot rather than settling for a rougher outline — the boundary is what tags the assets you photograph inside it.