You need at least one asset in your register before you can create an inspection. If you haven't added any yet, the Getting Set Up training webinar walks through adding your first assets. You also need permission to create inspections — if you don't see the option, ask your account administrator.
This guide walks you through creating an inspection in the Civic.ly web app. You'll learn how to assign it to a team member, choose a checklist, set a due date, and optionally set it to repeat on a schedule. Once created, the inspection appears in the assigned person's mobile app, ready to complete in the field.
Step-by-Step
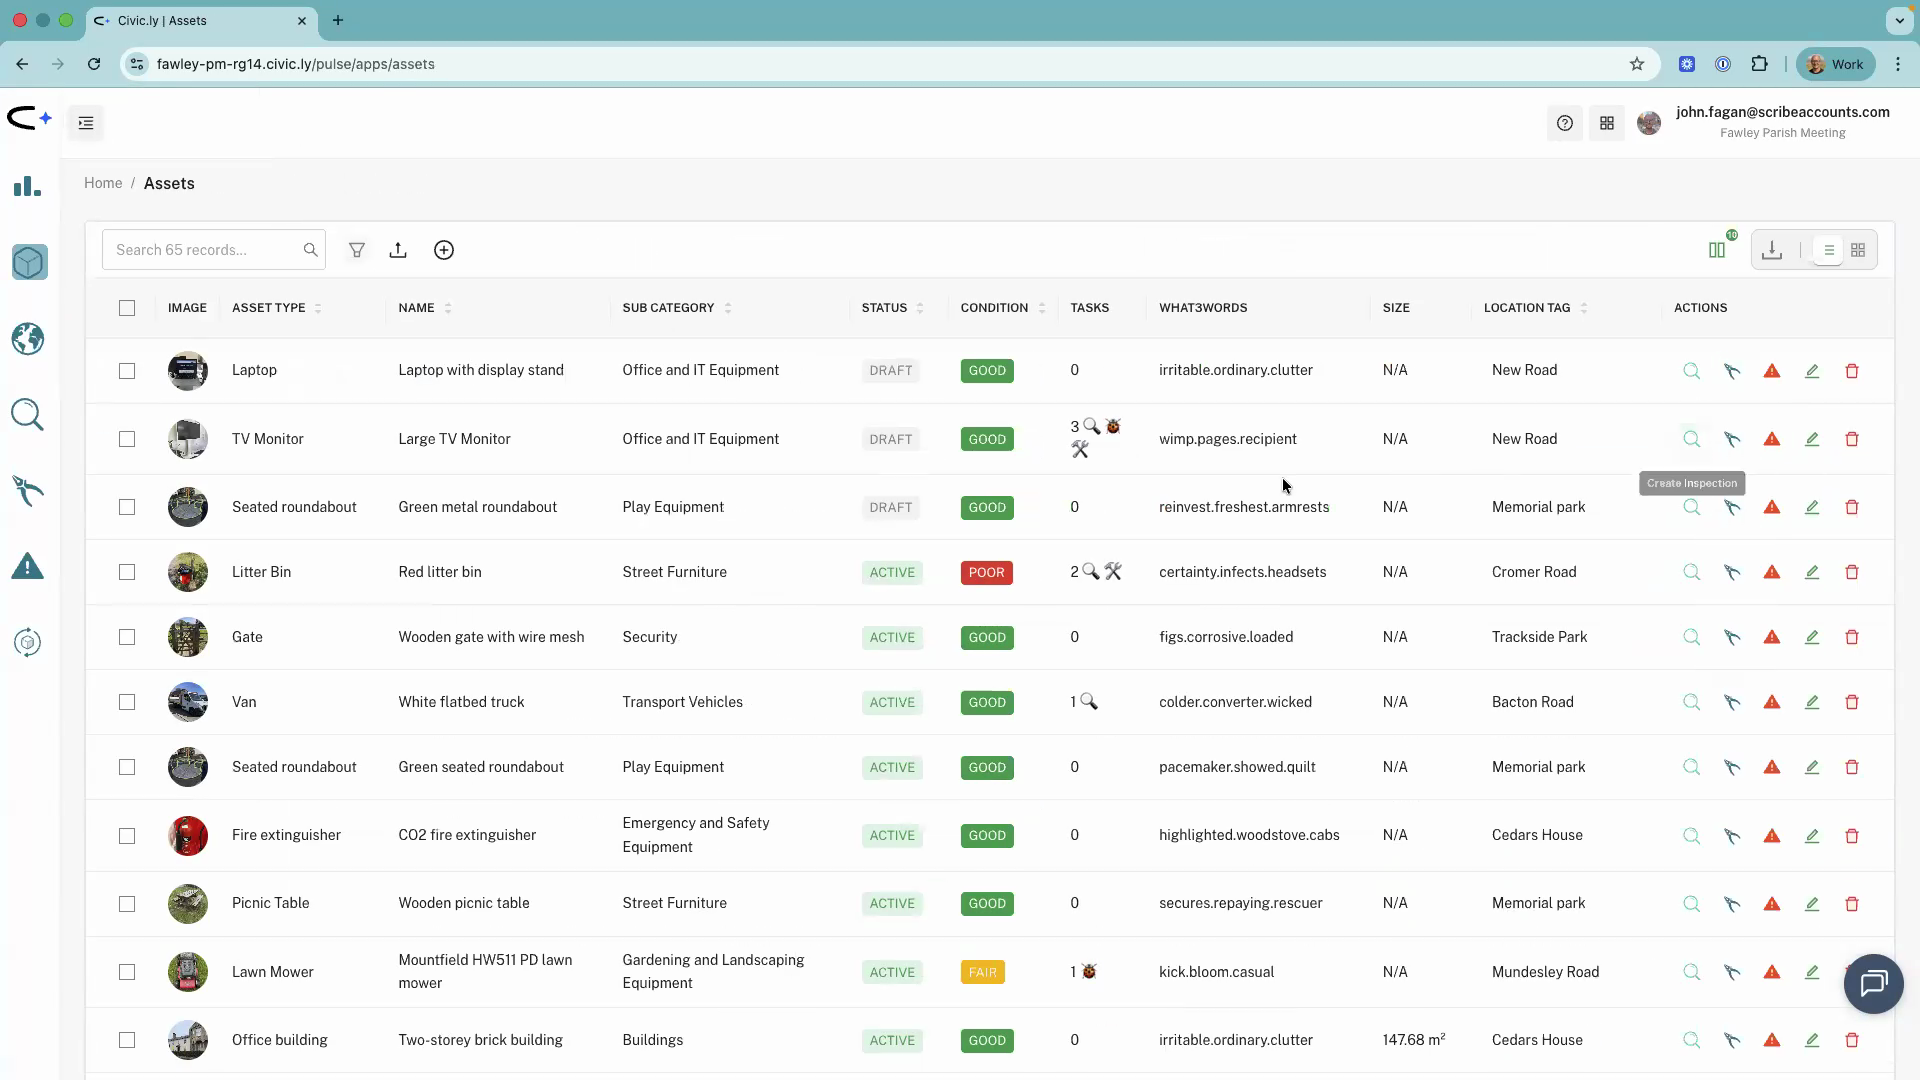
- Open the Civic.ly web app and click Assets in the left-hand menu.
- You'll see your asset list. Next to each asset, you'll find action buttons: Create Inspection, Create Job, and Create Defect.
- Find the asset you want to inspect and click Create Inspection.
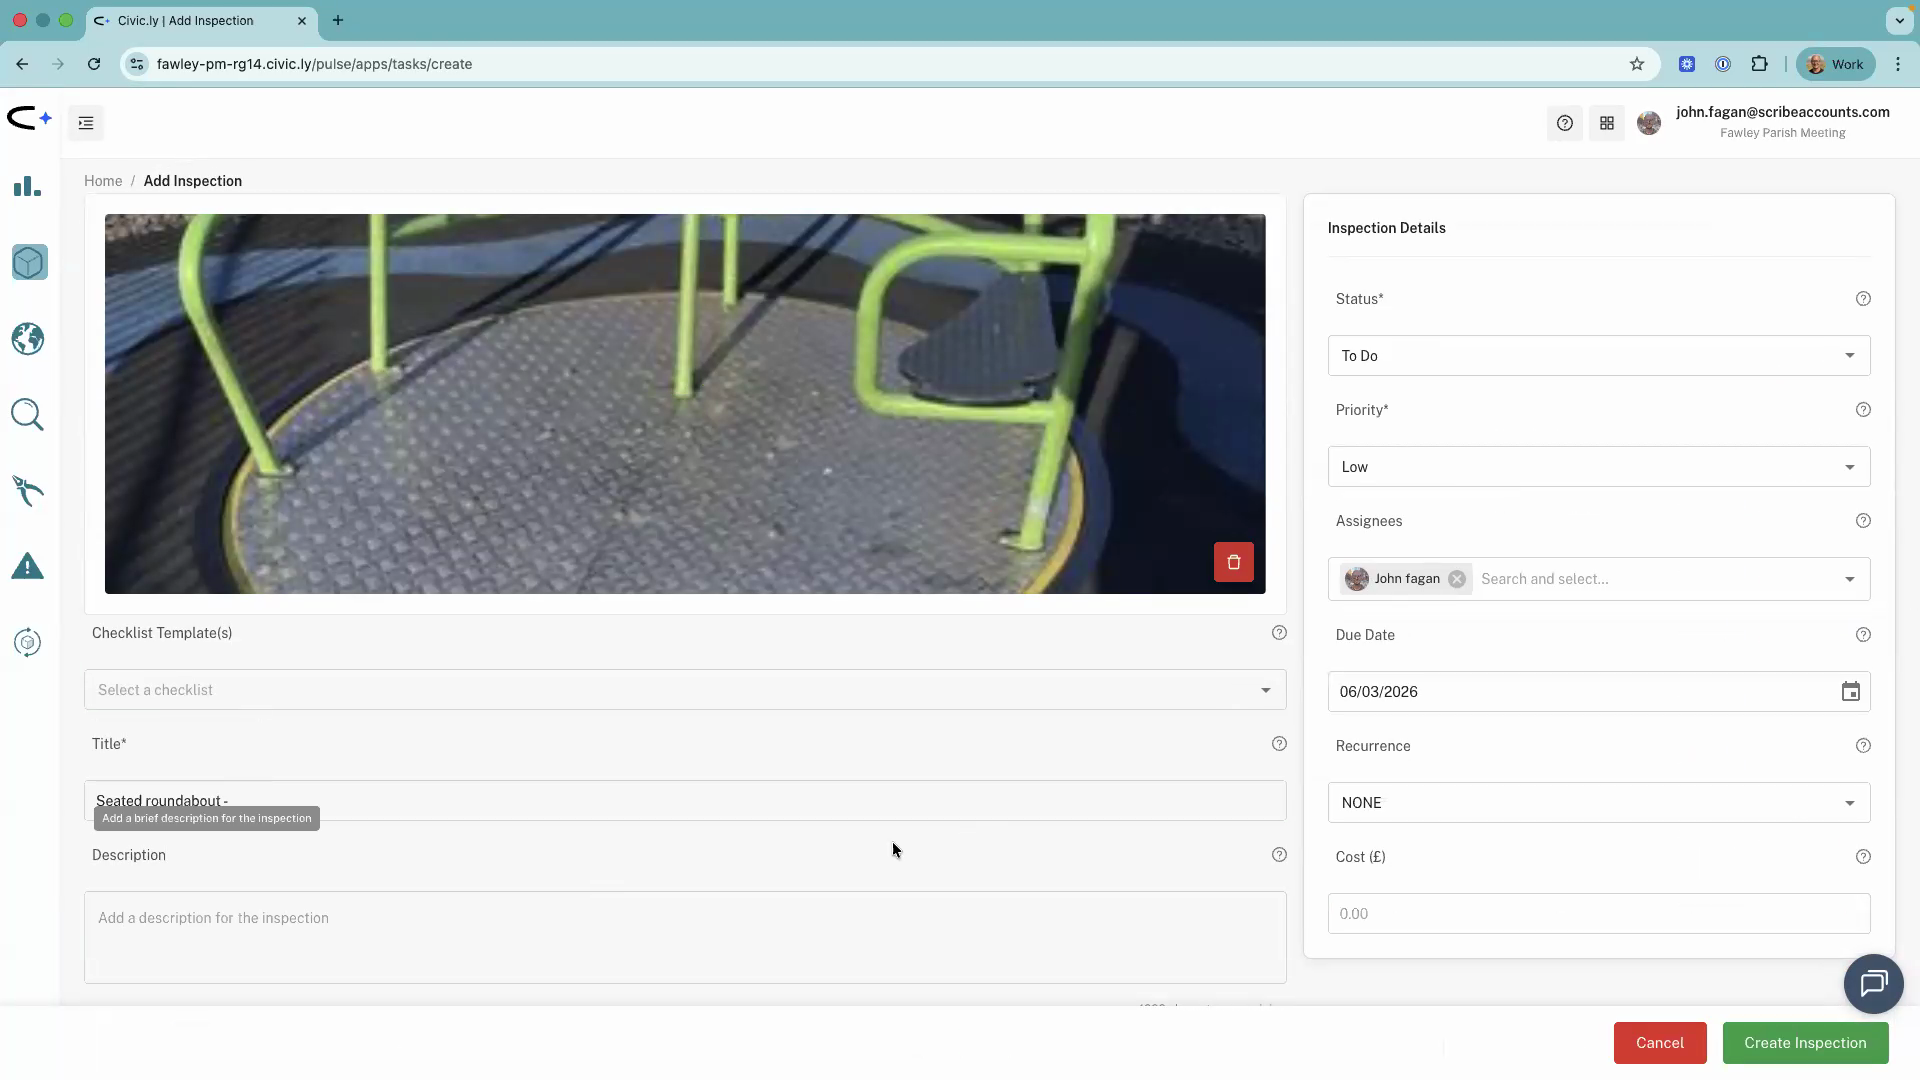
- Wait a moment for the form to load. You'll see the inspection form with the following fields:
- Status — leave this as the default unless you need to change it.
- Priority — set how urgent the inspection is.
- Assigned to — choose who should carry out the inspection. When you assign it, the inspection appears in their mobile app.
- Due date — set a deadline for when the inspection should be completed.
- If this inspection should repeat (for example, weekly or monthly), set the Schedule. You can choose anything from daily through to every 10 years.
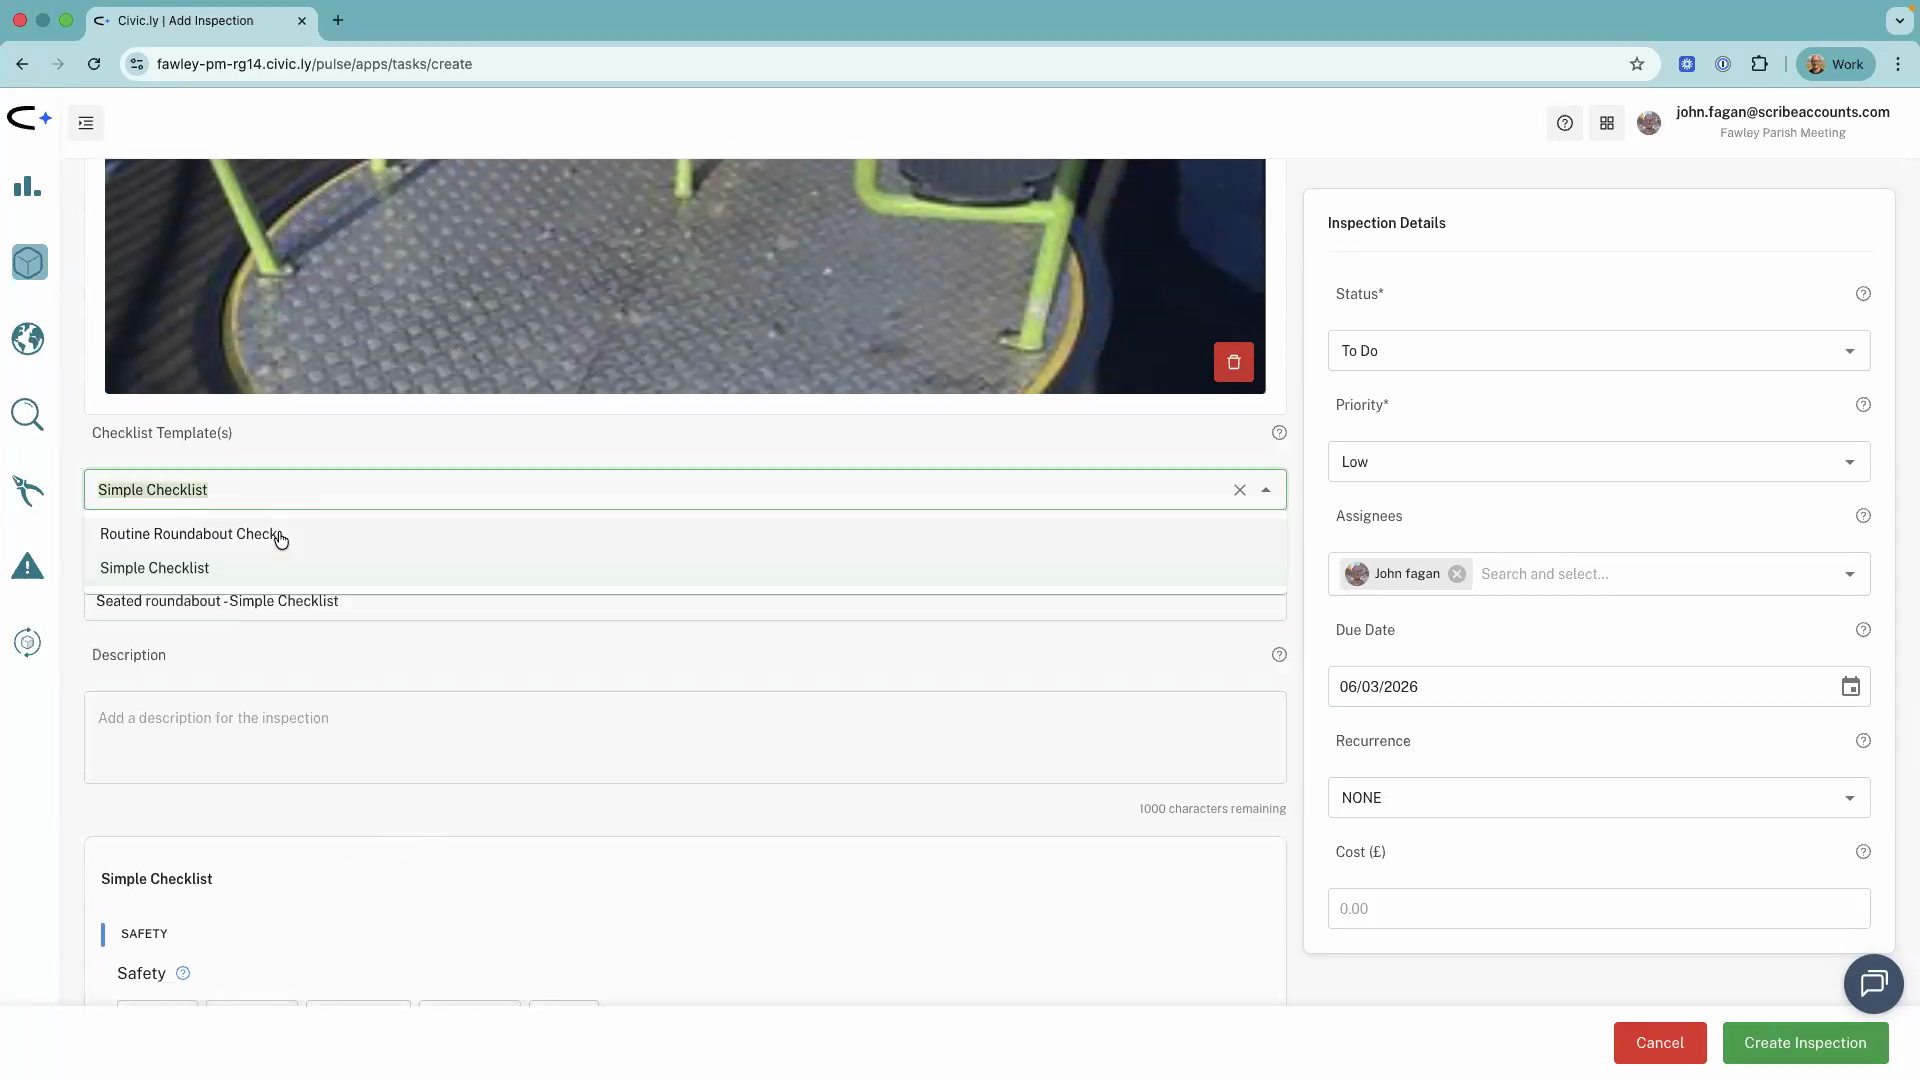
- Below the asset image on the left-hand side, select a Checklist. Civic.ly offers a Simple Checklist that works for any asset, plus asset-specific checklists tailored to particular asset types (for example, a routine roundabout check for roundabouts).
- When you select an asset-specific checklist, the task title is pre-filled for you. You can shorten or edit the title to something more descriptive, such as "Visual check".
- Optionally add a Description with further details for the person carrying out the inspection, and any Notes.
- Click Create Inspection.
Your inspection is now created. The person you assigned it to will see it in the Civic.ly mobile app.
Viewing Your Inspection
After creating the inspection, you can check it's been set up correctly:
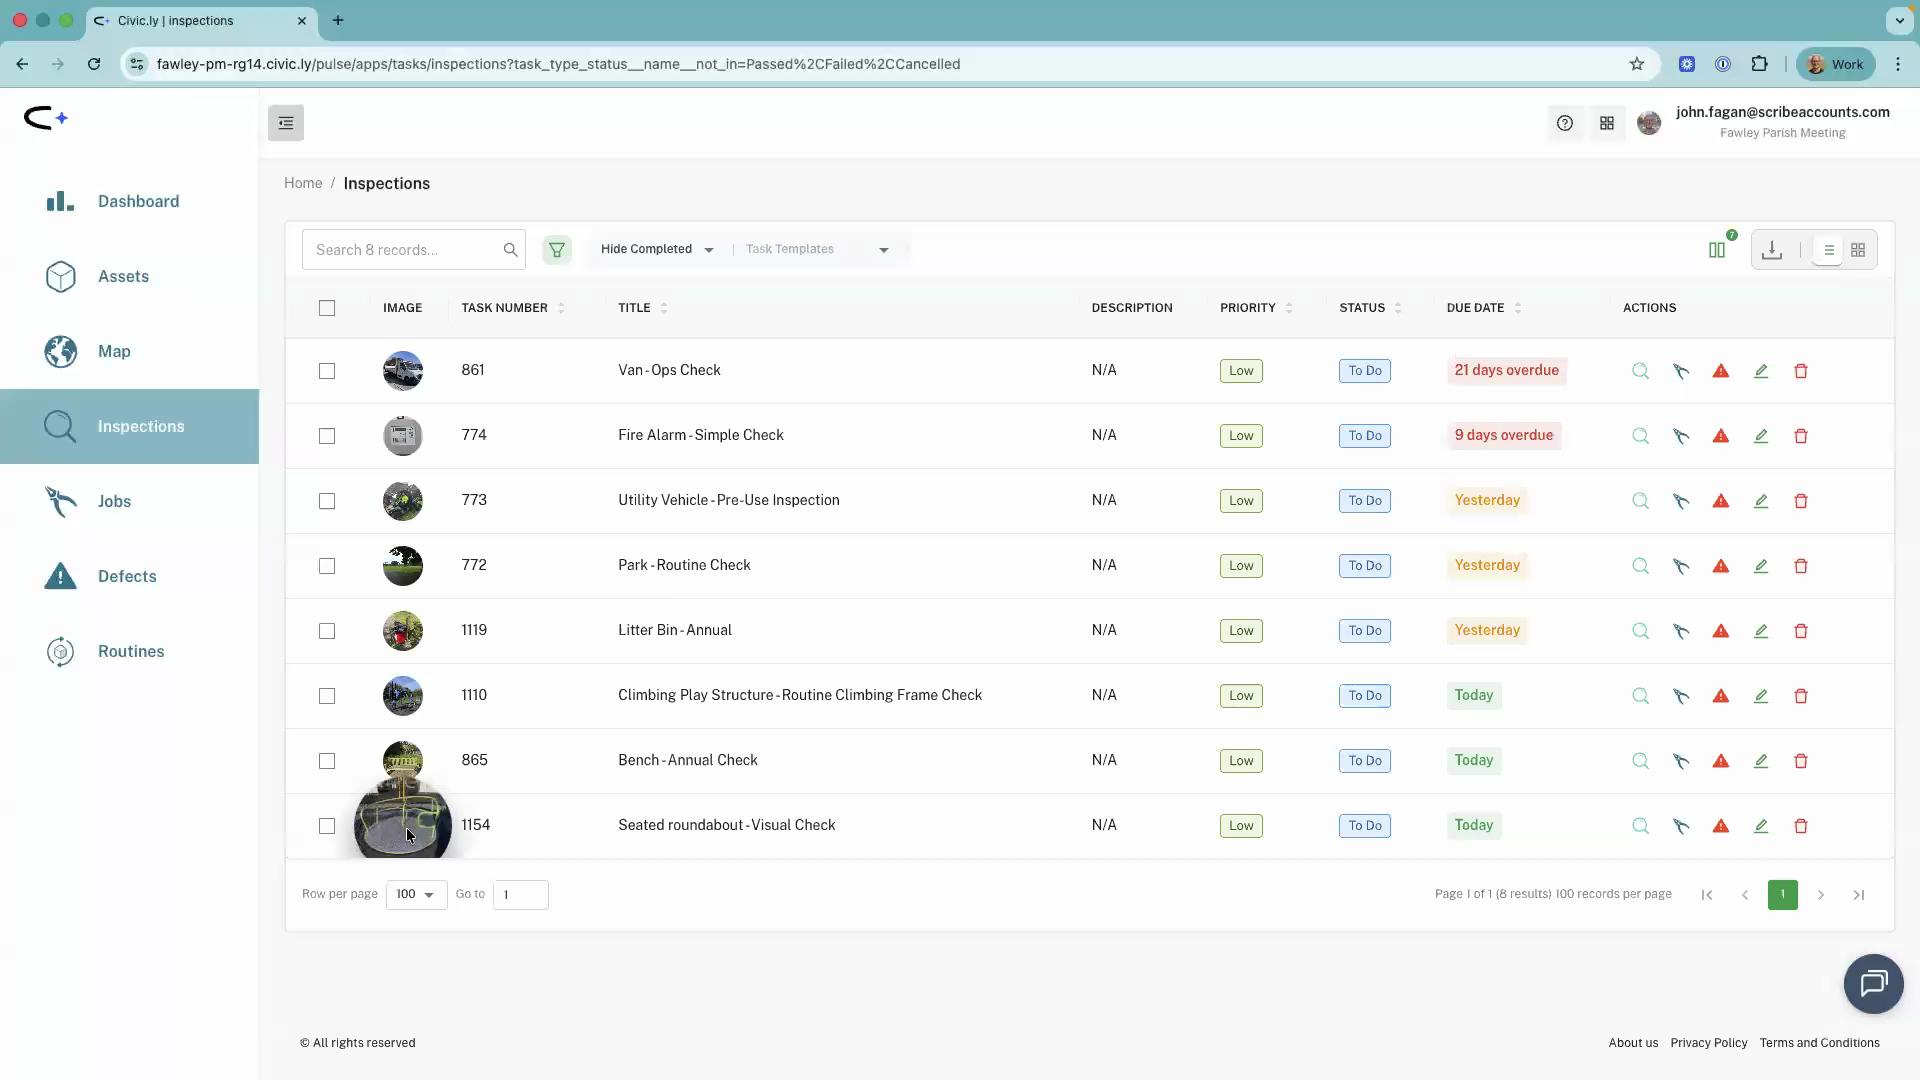
- Click the navigation menu in the web app.
- Select Inspections.
- You'll see your inspection in the list. Double-click it to open the full details and verify everything looks right.
- You can create inspections directly from the asset list without opening the individual asset record — the action buttons are right there in the list view.
- If you're setting up a recurring inspection (like a weekly playground check), use the schedule field rather than creating the same inspection manually each time. Civic.ly will automatically create new instances on your chosen schedule.
- Asset-specific checklists save time because they come pre-loaded with the right items for that type of asset. Use these instead of the Simple Checklist whenever one is available.
- Use the Description field to add specific notes for the inspector — things like "check padlock is secure", "look for ragwort", or "photograph any graffiti". This is especially useful when the checklist doesn't cover every detail you want checked.
- Inspections are not just for compliance — they also help you understand the condition of your assets over time, which feeds into budgeting and replacement planning. Even assets with minimal health and safety concerns (like benches) benefit from an annual inspection to track wear and tear.
Common Questions
Not at the moment. Civic.ly is designed to work out of the box — when you photograph an asset, the AI identifies the asset type and automatically links it to the relevant regulations and checklists. We are constantly adding and improving checklists, so if one needs a tweak or is missing entirely, please let us know at hello@civic.ly or post a suggestion on ideas.civic.ly and we will make the necessary changes across the platform. If you have a unique requirement that a standard checklist does not cover, you can add the extra detail in the inspection Description field, and the inspector can leave a note when it is done to keep an audit trail. Custom checklists may be offered in the future, but as an early adopter platform we want to use the collective feedback from all our councils — alongside our own compliance research — to improve the system for everyone.
A greyed-out button means your account does not have permission to create inspections. Ask your account administrator to check your user permissions.
The Simple Checklist is a basic checklist that works for any asset. Asset-specific checklists are tailored to a particular asset type — for example, a roundabout checklist includes items specific to roundabouts. They also pre-fill the task title for you. Use an asset-specific checklist when one is available, as it ensures you check everything relevant.
This guide covers creating an inspection for a single asset. If you need to inspect multiple assets as part of a regular round (like a weekly playground inspection), you can set up a routine. See How to Create a Routine for more details. You can also create on-demand inspections directly from the mobile app using the + button — useful when you are in the field and want to inspect something that was not pre-scheduled.
Yes. When you create an inspection, the form includes a Schedule field. You can set it to repeat at any interval — from daily all the way through to every 10 years. Once scheduled, Civic.ly automatically creates new inspection instances on your chosen frequency and assigns them to the same person. You don't need to create the same inspection manually each time. For full details on managing and modifying recurring schedules, see Scheduling Recurring Tasks.
The inspection appears in the assigned person's task list on the Civic.ly mobile app. They complete the checklist in the field, and the results sync back to the web app automatically. You can review completed inspections, see what passed or failed, and check any defects that were raised. If you need to make changes, open the inspection from the Inspections list and you can update the assignee, due date, priority, and other details.