This guide covers changing a round that already exists. If you haven't built one yet, start with How to Create a Routine.
Rounds change. Someone is off sick and a colleague covers their week. A bin gets added to the route. A piece of play equipment is removed, so the inspection that goes with it has to go too. This article covers how to make those changes, and — the part that matters most — how to control whether a change affects one week or every week from here on.
Opening a routine for editing
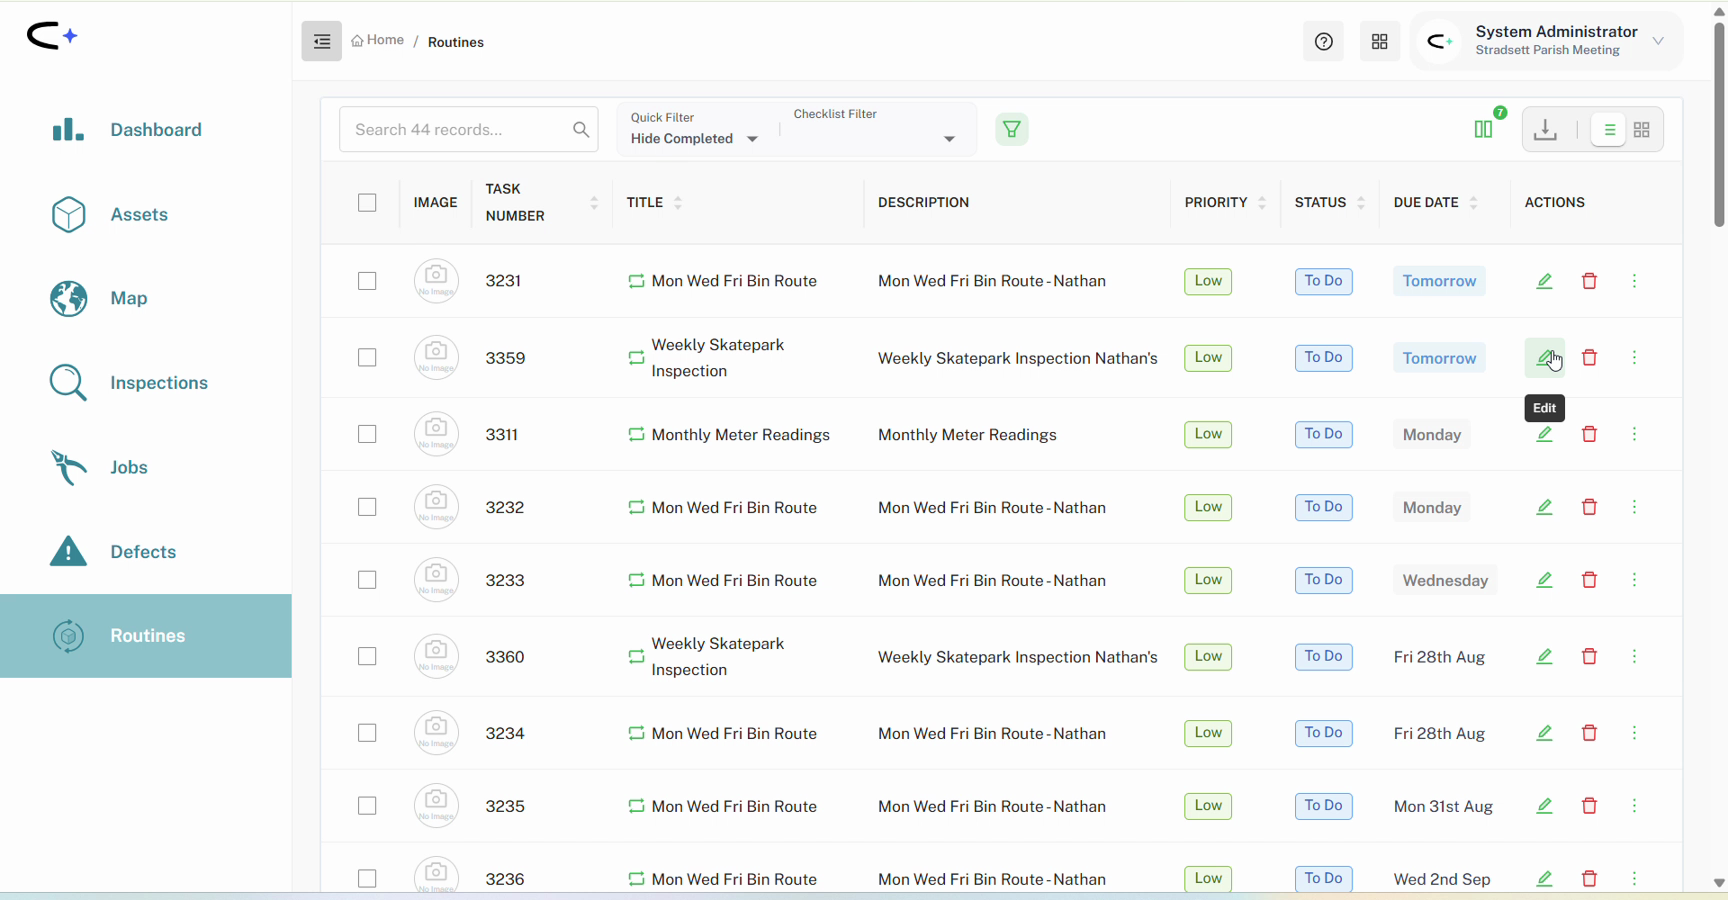
Go to Routines in the left-hand menu. You will see a row for each scheduled occurrence, so the same round appears once for this Friday, once for next Friday, and so on. There are two ways in, and they behave identically:
- Click the pencil icon in the Actions column to open the routine in a side drawer on the right.
- Double-click the row to open it full screen.
Use whichever you prefer — the drawer is quicker for a small change, the full-screen view is easier when you're working through a long list of tasks.
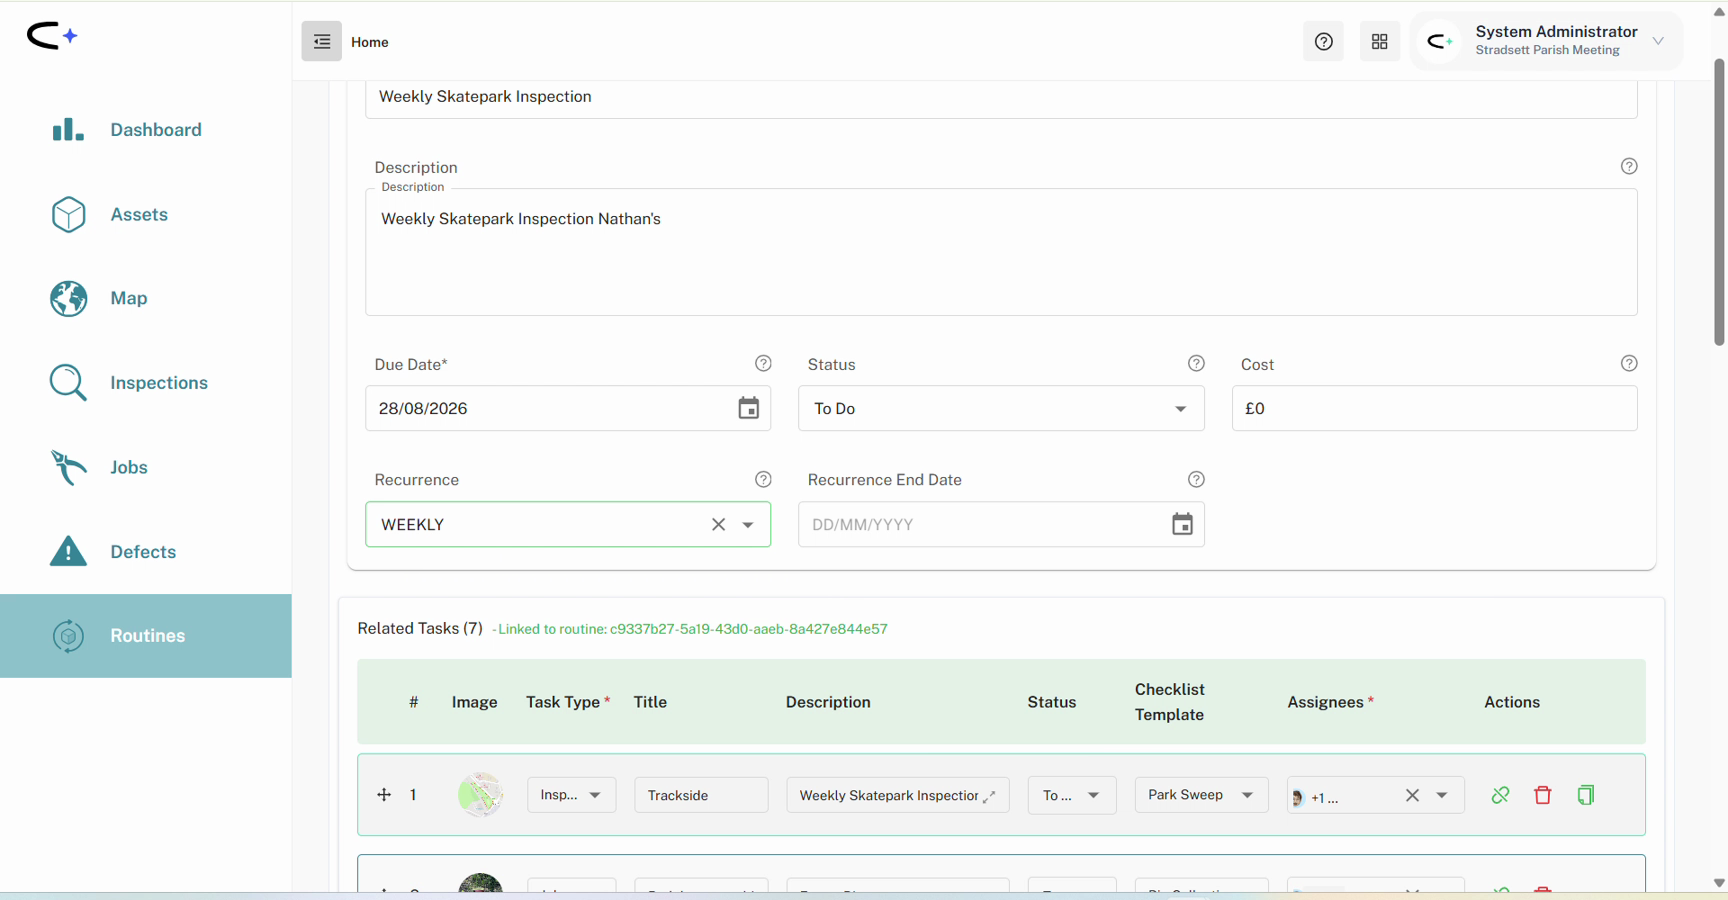
Check the Due Date before you change anything. Because each occurrence is its own row, it is easy to open next week's by mistake when you meant to change this week's. The Due Date near the top of the page tells you which one you have.
Changing who does the work
The most common edit is a change of staff. Open the occurrence, find the Assignees column in the Related Tasks grid, and remove or add people on the rows you want. If the change applies to the whole round, set row one and then use Bulk apply to all tasks (the copy icon at the end of row one) to push the assignees down to every other row.
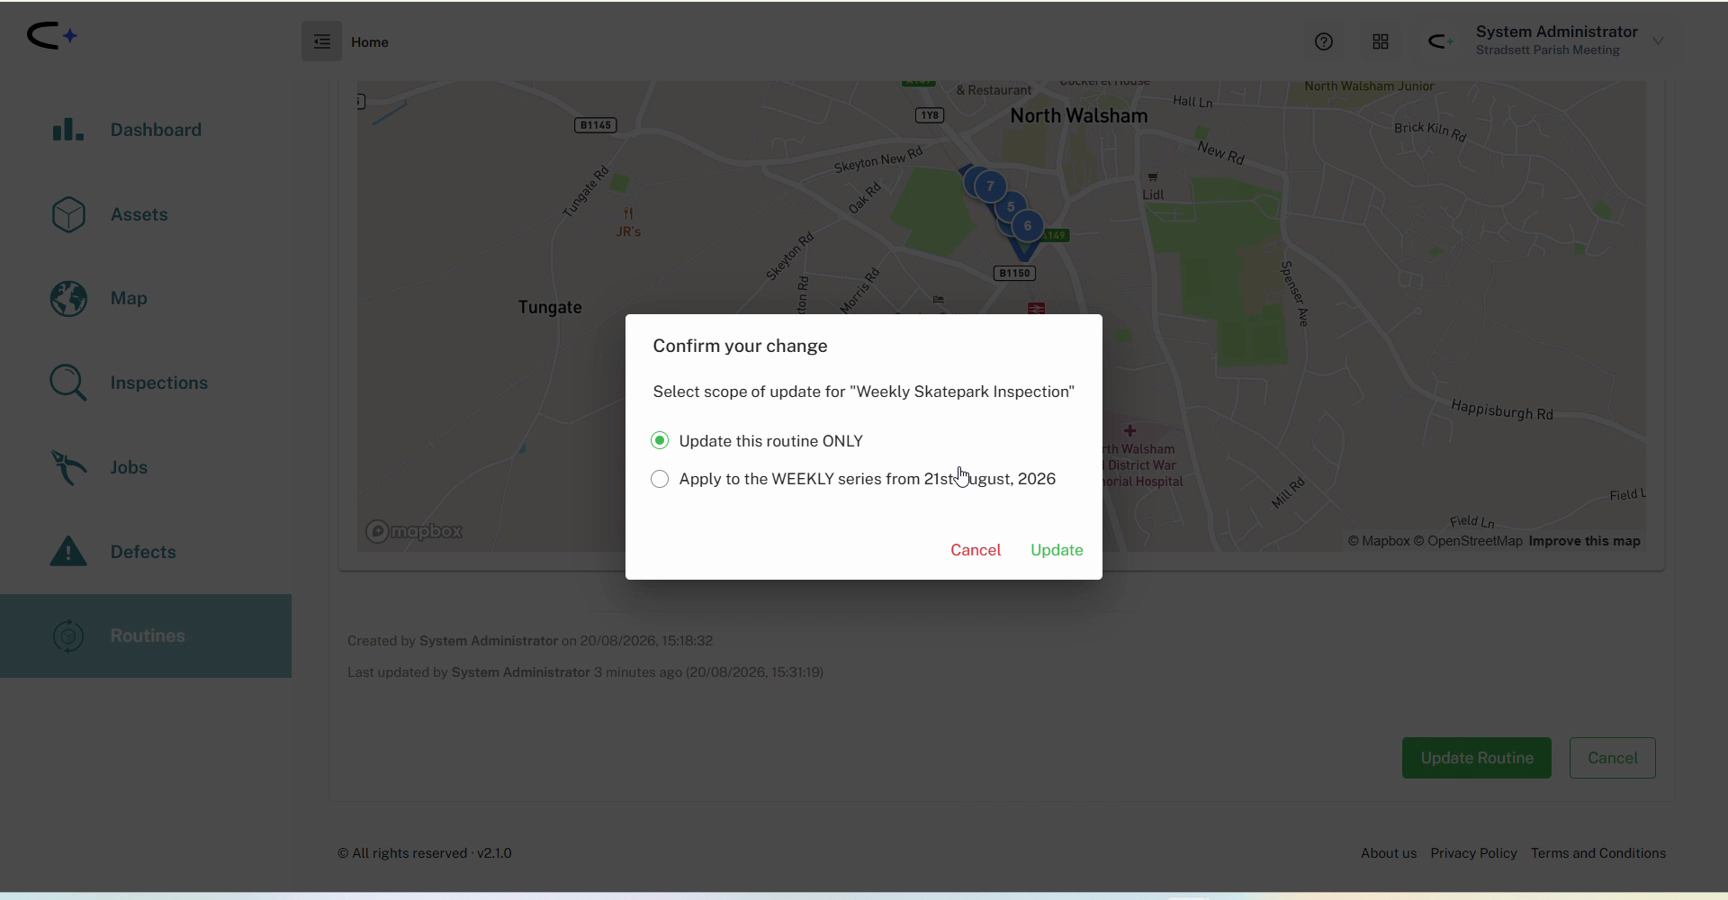
When you click Update Routine, Civic.ly asks how far the change should reach:
- Update this routine ONLY — the change lands on the occurrence you have open and nothing else. This is what you want when someone is covering a single week.
- Apply to the WEEKLY series from [date] — the change applies to this occurrence and every future one. This is what you want when the round has permanently changed hands.
Pick the wrong one and the fix is easy: reopen the routine and change it again with the other option. Nothing is lost.
Removing a task from a routine
There are two different ways to take a task out of a round, and they are not the same thing.
Unlink — keep the task, remove it from the round
Click the chain icon in the Actions column of the row. The task itself survives — the inspection or job stays in your Inspections or Jobs list and still needs doing — it just stops being part of the routine and stops being regenerated with it. Use this when a job still needs to happen but no longer belongs on the round.
Delete — remove the task altogether
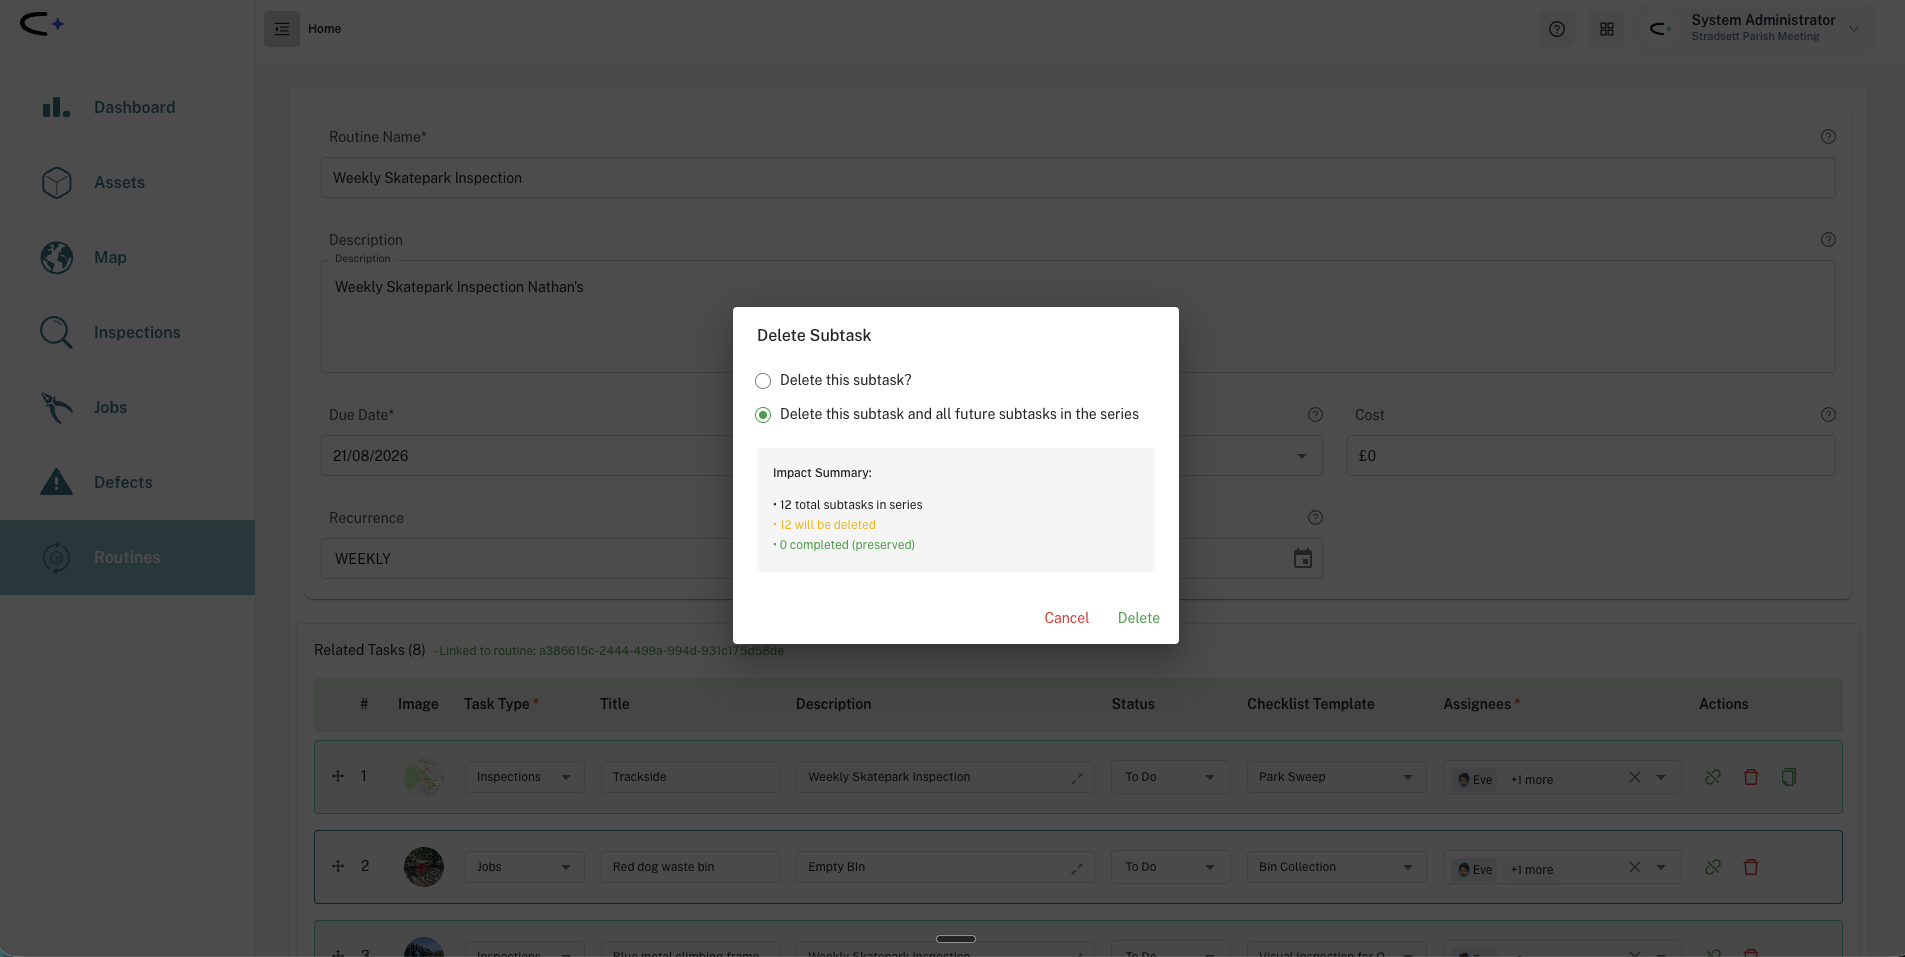
Click the bin icon in the Actions column. Civic.ly asks the same scope question as before:
- Delete this subtask? — removes it from this occurrence only.
- Delete this subtask and all future subtasks in the series — removes it from this occurrence and every one after it.
Pick the series option and an Impact Summary appears under it, telling you exactly what is about to happen before you commit: how many subtasks the series holds in total, how many will be deleted, and how many completed ones will be preserved. Completed work is never removed, so if you are taking a scrapped asset off a long-running round you can see at a glance that the history stays intact.
Use delete when the asset has gone: a bench removed, a bin taken out of service, a piece of equipment scrapped. Again, check the Due Date first. If you're on a future occurrence and choose "all future subtasks", you will leave the task in place on the occurrences before it.
Adding an asset to an existing routine
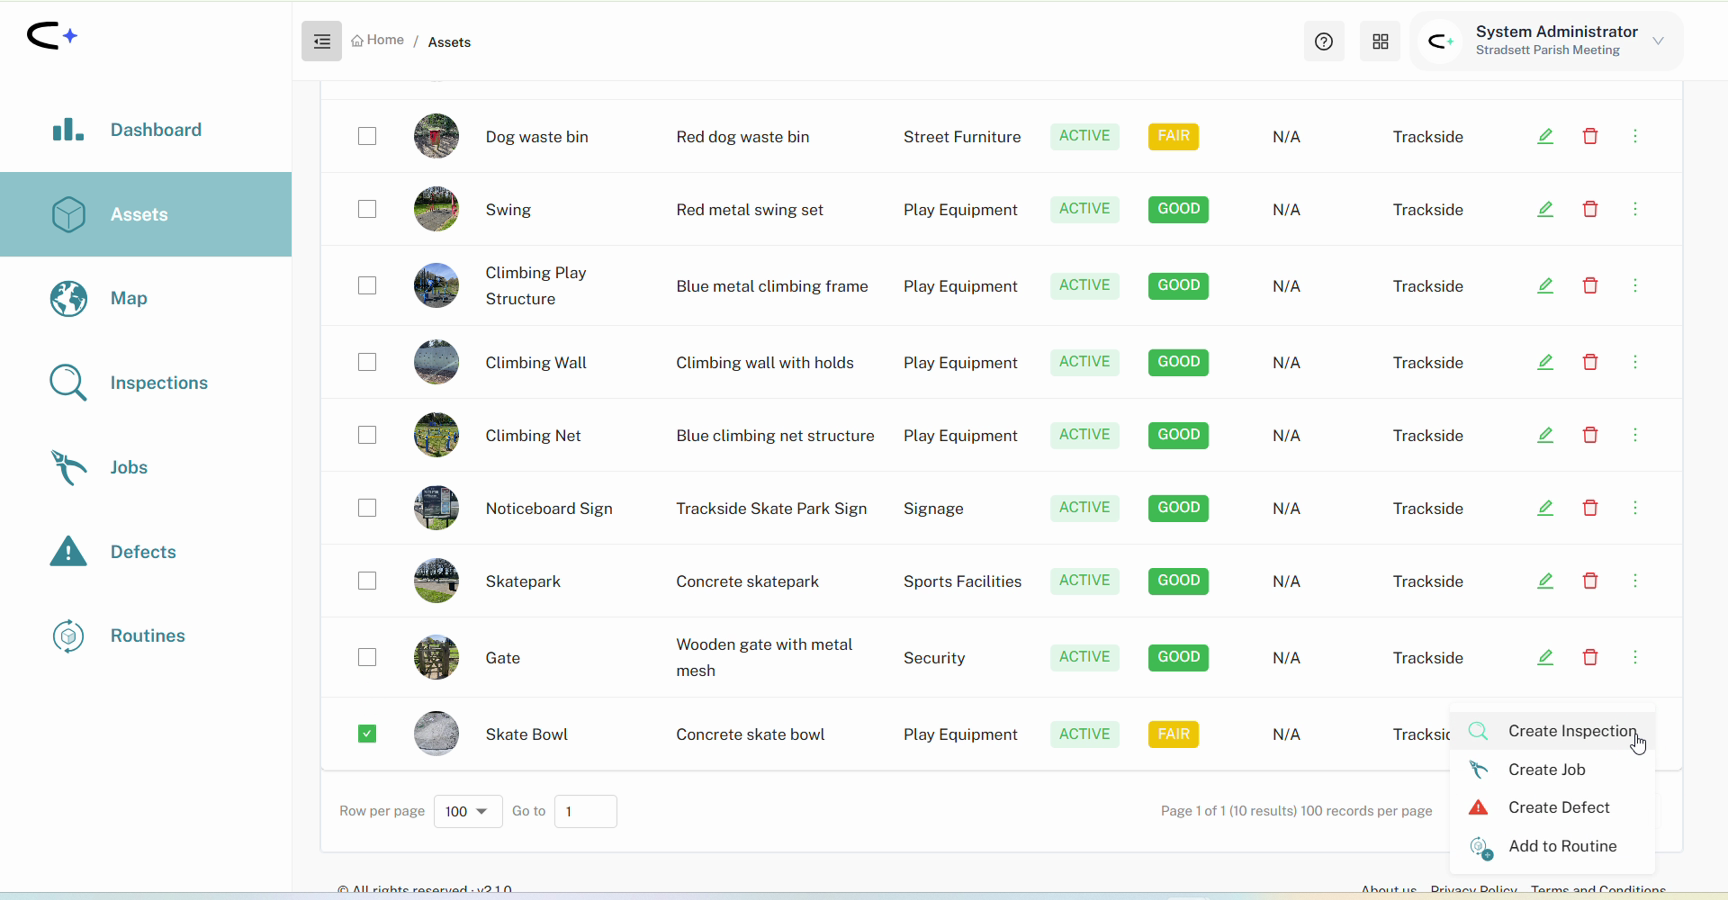
You don't have to rebuild a round to add something to it. Go to the Asset Register and find the asset — filtering by location tag is the quickest way if the round covers one site.
For a single asset: click the three vertical dots at the end of its row and choose Add to Routine. You can also do this from the asset's own page — Add to Routine is in the row of icons at the top right of the tab bar.
For several at once: tick the assets you want. The action bar appears at the bottom of the screen with an Add to Routine button next to Create Routine — make sure you pick the right one.
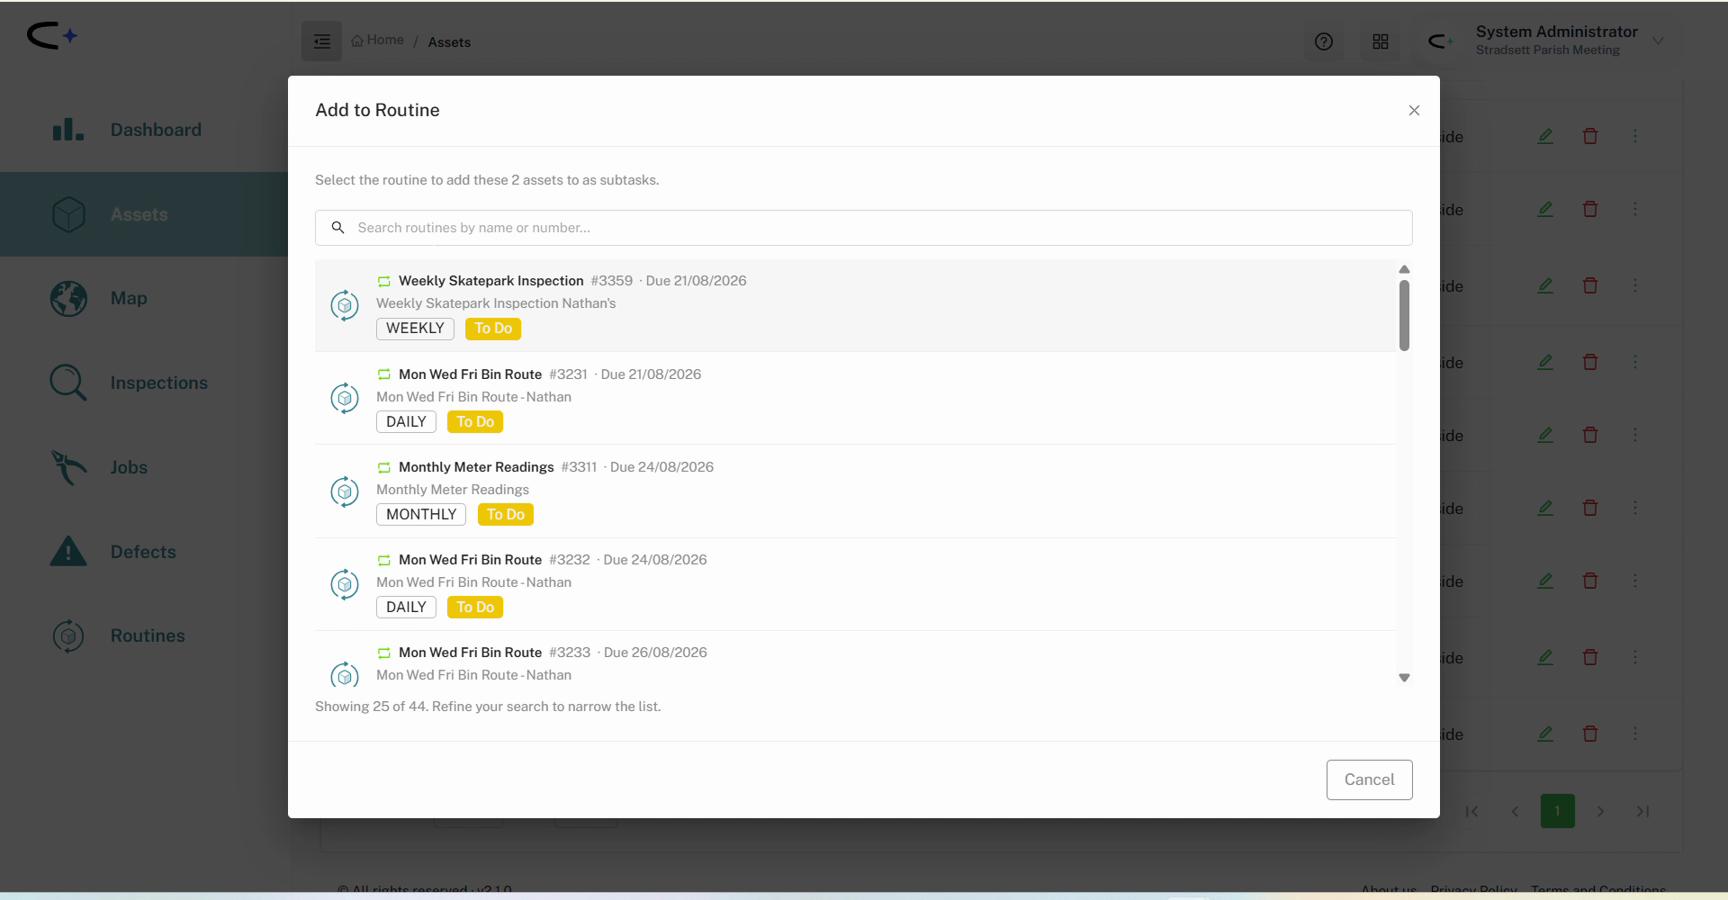
Either way, the Add to Routine dialog opens. It lists your routines with their name, task number, due date, recurrence, and status, and you can search by name or number if the list is long. Choose the routine you want.
The routine opens with your new assets appended to the bottom of the Related Tasks grid, flagged NEW. Set the Task Type, Checklist Template, and Assignees on each one exactly as you would when building a round from scratch — the new rows won't save without a task type and at least one assignee. Then click Update Routine and choose whether the additions apply to this occurrence only or to the whole series.
- The scope prompt is the whole game. Almost every mistake with routines comes down to picking "this routine only" when you meant the series, or the other way round. Read it before you click Update.
- Cover for one week, not forever. A colleague picking up someone's round while they're on leave is a "this routine only" change. A permanent handover is a series change.
- Unlink, don't delete, if the work still needs doing. Deleting removes the task. Unlinking keeps it and just takes it off the round.
- Adding assets is cheaper than rebuilding. If a round grows by a bin or two, use Add to Routine rather than creating a second routine for the new items — a site with two overlapping rounds is confusing in the field.
- Assignees are still mandatory on new rows. Rows added to an existing routine follow the same rules as new ones, so the update won't save until every new row has a task type and someone assigned.
Common Questions
Unlinking removes the task from the routine but keeps the task itself — it stays in your Inspections or Jobs list and still needs completing. Deleting removes the task entirely. Use unlink when the work still matters but doesn't belong on the round.
Open the routine again, make the change, and this time choose Apply to the [frequency] series from [date] rather than Update this routine ONLY. It will then apply from that occurrence onwards.
No. Changes apply from the occurrence you are editing onwards. Work your team has already finished stays as it is.
Yes. Open the asset and look at the row of icons at the top right of the tab bar — Add to Routine sits alongside Create Inspection, Create Job and Create Defect. It does the same thing as the three-dot menu on the Asset Register list.
No. Tick as many as you like in the Asset Register and use Add to Routine in the action bar. They all get appended to the routine together, and you can then use Bulk apply to all tasks to set the task type and assignees across them.
If you deleted it from a single occurrence, the task still exists on all the others, so you can carry on as normal. If you removed it from the whole series, add the asset back with Add to Routine and reconfigure the row.